Showing posts with label living room. Show all posts

Sunday, August 28, 2011

Sunburst Mirror


I don't need to tell you that sunburst mirrors are a hot decor item these days, as you've likely seen them all over blogland and in stores. So I'll just cut to the chase. 


I made my own sunburst mirror, using some bamboo skewers I picked up at the grocery store, silver spray paint, a small mirror from a craft store, some cardboard and hot glue. 
I started by spray painting the skewers silver. I then used my little hand saw to cut the skewers to various lengths. I cut off the pointed ends of the skewers, with the intention of having that end glued to the back of the mirror. 
Once the skewers were cut, I arranged them in somewhat of a pattern around the back of the mirror. I started by using a pencil to draw lines cutting the mirror into 8ths on the back, and put my longest skewers along those lines. I then filled it in by placing a skewer in the middle of each remaining section, while varying the lengths, really by eye. At this point I also giggled about how in theory I would need an infinite number of skewers to fill in my mirror. Perhaps some of you will appreciate this too.:)
Lastly I glued the cardboard circle that I made by tracing my mirror (before gluing on any skewers) over the skewers. I thought this would make it easier to hang.


It looks nice on the wall to the right as you come up the stairs to my apartment. The walls in that area are very large and very empty, so this is a good step towards adding some interest there.

HookingupwithHoH

Friday, April 8, 2011

Couch Pillows

As I explained recently, I got a cream colored slipcover for my couch, but needed to create the covers for the back pillows myself. I was really lucky to find that Joann's cream colored home decor fabric is a near exact match! So I bought yards and yards of it and made covers for the large pillows that make the back of the couch.

For the smaller throw pillows, I wanted to find either fabric or pillows with varying texture. I found this golden pillow at Kohl's on sale for about $10, and immediately knew I had to have it. I then bought the fabric shown, that I thought I was going to really like. But once I made the first pillow, I knew I had made a mistake.
Honestly it took me a while to decide what to do next. I looked at lots of different pillows and fabric but nothing really stuck out to me, until one day when I was putting clothes away or something in my bedroom, I suddenly realized the pillows on my bed would be PERFECT.
So I moved them onto the couch!


I feel like this is a work in progress. I will probably constantly be on the lookout for new textures or even a second pattern to change out the pillows. But for now, I am really happy about the look of my couch. It feels good to learn to work with what I have rather than just buying new.
Before:

During:

 After!


Monday, April 4, 2011

It's Looking Very Pottery Barn in Here

The title of the post is what someone commented when they saw one of my latest projects.
My couch is a big, purple beast. My roommates and I got this couch in college, about 5 years ago now, in Chicago. Its long, wide, comfortable, heavy and was basically a steal from an awesome thrift store in Chicago. It has a pullout bed which has severed us well many times, and its size was excellent for gatherings in college.

Here is my couch in my previous apartment-- I just realized that I haven't ever really shared pictures of the couch in my new apartment!


While this couch is awesome for many reasons, the one thing I have always struggled with is how to decorate around it. It is such a bold color, and being a novice with design, I felt really constrained. I longed for a more neutral couch, and in a perfect world,  I would be able to buy a new couch (perhaps a Karlstad from Ikea), but that just isn't happening now. 
So Imagine my excitement when I stumbled upon a two-piece twill cream colored slipcover at Target, on clearance!! Given the style of the couch--with no real cushions for the back, just the throw pillows, I knew it would take some tweaking for this to really fit my couch, but it was an excellent starting point. I would have loved to make it from scratch myself, but I'm just slightly scared about trying that!
So, after some fighting with the slipcover, she was on my couch. I just needed to make covers for the back cushions and iron.
Yes, Iron. You see those wrinkles? They needed to go. So I ironed the slipcover one morning while it was on the couch. Yup. I ironed my couch. But it looked much better. Even Franklin approved.

Now I just need to finish making covers for the pillows that go along the back, and perhaps pick some patterned fabric for accent pillows!


Friday, December 17, 2010

Because I couldn't resist...

I went to Target a couple days ago and saw the plastic bulbs in the $1 sections, and I couldn't resist buying some.I've seen so many ways people have used them this year, I decided to go for my own interpretation.


I wanted to use clear tacks so they weren't visible, but I didn't have any. All I had were these large color tacks, so I decided to just go with it and make that part of the decoration. This area at the top of the stairs has been puzzling me since I moved in so I'm appreciating the decor there for now.

Sunday, September 5, 2010

Frames: Before and After

As part of my gallery wall, I bought a frame and a mirror at the Salvation Army. The frame was for a picture that was previously in a silver frame, which didn't fit with my plan.
Here is the frame before, with the beautiful artwork that it came with:

And since I was so enjoying painting outside on the balcony, I forgot to take a true before picture of the mirror. So here's a "just after I started painting" picture:

The gold frame took several coats and sanding between coats to make it look the way I wanted. The mirror was much easier.

The gold frame is in the middle in the picture below. I put a picture of my dad and his wife, my sister and I from my dads wedding last summer.

And the mirror:


It's really hard to get a good picture of a mirror!
This just shows how easy it is to take cheap frames from thrift stores and make them into something you'd be proud to display!

Monday, August 23, 2010

Gallery Wall: Part 2

I decided to take a rather scientific approach to this wall, and did some research (because thats what I'm good at). In my last post I showed some inspiration pictures that I found during my research. 

The first thing I did was gather all of the items that could potentially go on the wall- pictures, mirrors, candle holders, etc. I had a few things that needed some changes- a frame I already owned that needed to be painted, a picture in a silver frame that I wanted to  reframe, and some empty space I needed to fill. 

I started by painting the frame I already owned with my black latex glossy paint. I actually found this frame in the alley behind my apartment in Chicago, two years ago. I really liked it although I had no idea what I would do with it. I contemplated many different things- adding some screening to make it an earring holder, adding a mirror, framing my diploma (it was too small...) and ultimately just hanging it empty. The picture below is the best picture I have, I think. You can see, I am preparing to paint on my balcony! Painting outside is really nice.
This frame really did not want to be painted. Even with sanding and cleaning it off, the first coat of paint wasn't sticking well. So, I re-sanded (lightly) and did another coat, and then repeated the process again. In retrospect, I probably would have done better to use some sort of primer, but it was already too late when I decided that was the case.
Once I had that frame painted, I started putting together the layout. First I needed to decide where to start on this monster wall- in the center, or on the side. Pardon the horrible cell phone picture, but it didn't occur to me to take a picture of this with my camera.

The horrible cell phone picture helped me decide that I should start on the side, so I laid out all of my items on the floor in the arrangement I wanted on the wall.  I won't lie- I left it like this on the floor for a couple days, stepping over it many times a day to decide if I liked it.
Once I was satisfied, I used blue painters tape to put the entire arrangement on the wall. Again, I left it for a while to make sure I liked it. 

Once I decided it was what I wanted, I actually started putting nails in the wall to hang things.

OK, OK, enough. Here's the final result:

More about the mirror and picture frame I added later.

Thursday, August 19, 2010

The Livingroom: Gallery Wall

A daunting task in the decorating of my new apartment is the walls in the living room. Two of the three walls are very large, and uninterrupted. They come to a point in the center, which is 10 feet tall, the other sides are the normal 8 feet.
One of the two monstrous walls
What to do with this? I feared that any of the wall decorations I currently own would be dwarfed by the wall and just look ridiculous. So I needed to think of something else. Looking at how I'd arranged my plate collection on the wall at my old apartment (and possibly my new?? stay tuned) I decided that I should do a gallery style wall. What is a gallery style wall? Well, a wall with a lot of pictures or other items hung in a seemingly random way. Here are some pictures I have collected of particularly awesome gallery walls. (All taken from Design*Sponge.
I love how they all have a connecting theme, but each has its own feel. One has all black frames with black and white photography and art, another is silhouette themed, and the last one pictured is all artwork created by the owner's friends. Given what I own already or could easily modify, I decided that I would use all of my photos framed in black, my newly framed master's diploma, and scatter in some other things-- a mirror, an empty frame, a floating shelf with a painting, and the two sconces I had in my living room at the other apartment. 

Want to see how I went about designing and implementing the wall? Well stay tuned for my next post where I will explain the rest of the process.

Wednesday, June 16, 2010

Bench Redo

A couple weeks ago I found this bench at the Salvation Army. That particular day they were having a sale- if you bought a piece of furniture and took it that day, you got 30% off. This baby was marked $7.99, and lucky for me, they considered it furniture. I got to take it home for just about $5. 


I purchased 2 yards of brown zebra print fabric (WAY too much) from Joann's, a button covering kit, 10 yards of nail head trim (didn't need that much, but that's how it came), and an upholstery needle. I spent approximately $40 on these supplies, but I have many things left over for other projects.
It look me a couple hours to remove the original fabric-- tons of nails, thumb tacks and staples holding that stuff on. 

Once I got that off, I was lucky to discover a rather clean and intact seat. The structure of the seat itself seems to be pretty solid, I was expecting it to be questionable. 
 

It only took about two hours to recover, make the buttons and put them on, and add the nail head trim. These steps were all very easy! I was surprised. Putting the buttons on was probably the most time consuming step. I tried to tuft it a little- it was hard to achieve the level of tufting that I wanted. I think its something I can rework in the future, perhaps with some stronger thread.


The last step was to paint the legs of the bench. I cleaned them first (gross!) and then sanded, and used a dark brown paint with a shiny finish. I am honestly considering painting the legs black now because I don't think the brown is dark enough. The zebra print is brown, and the lighter brown paint makes it look more black.


The last part of the project (save potentially repainting the legs) is to figure out where this beauty is going to go. Franklin and Eleanor are enjoying using it in the living room as an elevated bed, so it may stay there for now. There is also the option if it becoming a foot rest/table in my office (with the chair that I bought with the intention of recovering). Now that I have tried my hand at recovering something, maybe I will attempt the chair!

Monday, June 7, 2010

Apartment Tour: Living Room

The next installment of my apartment tour is of my living room. The living room has been subject to some of my most time consuming and in depth projects. There is only one thing in my living room now that I had when I moved here not quite two years ago. Needless to say, the living room has been one large project since I moved in.

This is the left side of my living room. In the window you can see three hanging planters-- they are small metal buckets I got in the dollar section at Target, hanging from clear fishing line. I modeled this project after a project I saw to hang plants upside down. I was originally going to make some upside down planters, with the intention of getting the plants out of the reach of Franklin and Ellie, but I wasn't sure how the plants would hold up upside down. Ultimately I think this is a better solution--and they came in this lime green color straight from the store, no other work for me.
The vase shelves behind the couch are from Target, along with the green vase and the sparkly picks in the vase. These picks were part of Target's Christmas decorations and I immediately decided I needed them upon seeing them. I was good though, and waited until they were 50% off before I bought any. The picture leaning against the wall is actually a little tile with a picture of the Eiffel Tower on it, brought back from Paris from a good friend. The little animal next to the Eiffel Tower is from my boss at my last job in Chicago, from her trip to Mexico.
The silver lamp on the left side of the couch is a find from the Christmas Tree Shop. This lamp was originally in the office, but it has made its way out to the living room as I have rearranged lamps. It's hard to see in the above pictures, but the lamp on the right side of the couch is the Eiffel Tower!! I got this lamp as a Christmas gift a few years ago, but it is from Target. It started out with a red shade, but I recently replaced it with a white shade to match the other lamps in the room.
The table the Eiffel Tower is sitting on is one of my refinishing projects that I wrote about here. I got the table for a very small amount at the Salvation Army, brought it home and sanded, painted and polyurethaned it. I really like the shape of it and its clean lines.

One of the biggest projects I've done in the living room is the armoire. The armoire is really the project that started the blog. I bought it at the Salvation Army for under $75. It was cherry colored wood and had old, outdated hardware. It took me quite a while to sand it all, prime and paint the inside and outside, spray paint the existing hinges (because I could not find any others that were the correct shape) and replace the hardware. My apartment was literally taken over by this project for a couple weeks last summer. You can read more about this colossal project here, here here and here. Overall I am extremely proud of this project, and also it is a really functional piece of furniture. Not only does it hold my TV and DVD player, its also a great perch for kitties and an excellent place for my plants to get some sun.


On the other side of the room lives my my newest lamp acquisition (read more here and here), and my kitchen.
The bookcase was a purchase from a friend when he left Chicago after college (thanks Kenneth! I love it), and the other table is one I found on the side of the road. I love the detailing on the legs of the table. I actually had the table for several months in my office, unpainted. Then on the morning of this photshoot I decided I needed to paint and use it. I painted it black for this purpose, but I think one day I will do something a little more exciting with it. The Big Ben tower was a gift that goes along with the Eiffel tower. The plant is an African Violet-- I love how they flower, and I seem to be relatively successful in keeping them alive and happy. The basket is an inexpensive one from Target, and if you can see inside the basket- there are some glass orbs that were gifted to me as an 'apartment warming' present. I believe they are from the Christmas Tree Shop. The big awesome mirror above the table is a steal from Walmart. The mirror is about 2 X3, and I paid something crazy like $10 for it. I don't know if it was mismarked or just on sale, but it was an excellent find. This mirror was at one point my "headboard" but I like it much better in this location.

Well, I think that's all for the apartment tour! Rest assured I have many other things to share with you!

Sunday, March 28, 2010

My New Best Friend


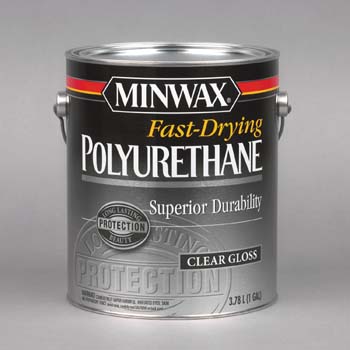
 Is clear polyurethane. From reading other DIY blogs, I know that a coat of polyurethane can make your painted furniture more shiny and more easily cleaned, but since I have always used high gloss paint I hadn't tried it. Well, after being frustrated with the side table tin my living room looking dirty, I decided to see what it did. I am VERY pleased with the results. After doing the side table, I also did my desk. I notice that when I am writing with a pencil, often the color gets transferred to the desk, and I have to wipe it off fairly frequently.
Before before:
And then:
And now:
Ok, Maybe its hard  to tell from these pictures. But it looks and feels different in person.

And the Desk:

I'm not sure what other people do, but the friendly guy at Ace told me he likes foam brushes for applying polyurethane. I took his advice, and wasn't disappointed. Not only did it apply easily and thin, but the brush itself was less than a dollar, compared to about $7-8 for a brush. If only I had more things to polyurethane...