Wednesday, March 31, 2010

Kitchen Shelves

At some point in the last few months I put up some shelves in my kitchen. I wanted to display some of my nicer dishes and vases, and also at the same time put something on the huge empty wall in the kitchen. The other walls have plates and baking dishes on them, so I was kind of out of options for the big wall.
I was prepared this time--since I was planning to get some customizable shelves from my favorite hardware store (Ace Barnes Hardware!!) I wanted to be sure to get the right size for the space. I measured the wall and approximately how high up I wanted the shelves. I decided at that point I wanted probably 2 shelves. Since my walls are white and I don't have a real color scheme in the kitchen, I decided to go with white shelving.
I got the metal rods, brackets and shelves very similar to whats pictured above. It was very easy to put up on the wall--it came with all the necessary hardware and only required a screwdriver.

I put my colorful collection of  vases and what not on the shelves at first:


Inspired by others dining room hutches and shelves I've seen in blogs, I decided to streamline and put only one color on the shelves. The collection started with the cow shaped creamer you can see in this picture. I added a vase I found at the salvation army, and one day I found a couple other vases at Michael's.


I am overall very happy with this look. Eventually I may spray paint some of the pieces to match the others more closely. The pitcher in the middle in particular is much more of a cream than a white. Another future change is to replace the college-style black metal cubes with a real buffet or cabinet. I've had my eye out for a long dresser at the Salvation Army that could be used in the kitchen, but so far I haven't had any luck.

Sunday, March 28, 2010

My New Best Friend


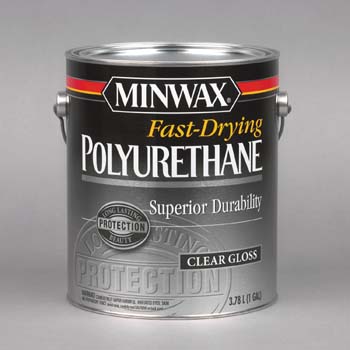
 Is clear polyurethane. From reading other DIY blogs, I know that a coat of polyurethane can make your painted furniture more shiny and more easily cleaned, but since I have always used high gloss paint I hadn't tried it. Well, after being frustrated with the side table tin my living room looking dirty, I decided to see what it did. I am VERY pleased with the results. After doing the side table, I also did my desk. I notice that when I am writing with a pencil, often the color gets transferred to the desk, and I have to wipe it off fairly frequently.
Before before:
And then:
And now:
Ok, Maybe its hard  to tell from these pictures. But it looks and feels different in person.

And the Desk:

I'm not sure what other people do, but the friendly guy at Ace told me he likes foam brushes for applying polyurethane. I took his advice, and wasn't disappointed. Not only did it apply easily and thin, but the brush itself was less than a dollar, compared to about $7-8 for a brush. If only I had more things to polyurethane...

Lamp

I got a new shade for the lamp. I'm unsure about how the colors look together, but For now, I like it. I got the shade at Target for $14.99, and this style shade doesn't require a finale. I will just save the blue shade until I have a need for it or send it to the Salvation army in a rage of cleaning things out.

Saturday, March 20, 2010

Awesome Find

One of my favorite blogs has an advertisement on the side for a website with awesome lamps. This lamp is always teasing me:

Unfortunately, it comes with a steep price tag: $299. I don't see that being an option anytime soon.

Imagine my excitment today when I find this little gem in my local TJ Maxx:
Price: $29!
Sure, its got a blue shade which doesn't fit in my decor at all, and its missing a finale..and its a different shape. But its the same lamp!! With a new shade and a finale (which will still keep this lamp at a really reasonable price) this lamp will fit right in. In the mean time I will pretend I just saved $270.