Showing posts with label furniture. Show all posts

Monday, July 29, 2013

Overwhelmed

Silence on my blog has not at all meant no projects have been going on. Quite the opposite, actually. I'm a little overwhelmed trying to write about massive projects I have done in the past several months, so I am going to start very small. 
I was recently in the market for a new chair for the desk in my bedroom. I would have loved a Jonathan Adler Chippendale chair--or any Chippendale chair really, but something new was just not in the budget.
I headed to the local Habitat for Humanity ReStore--they were having a Grand Re-Opening Celebration!! which included 15% off everything. I thought I may have some luck finding a unique chair there, and I was right.

I got this bamboo arm chair for a song- it was marked $10 but as I said before everything was 15% off. So I paid about $8.50 for it plus tax. It has a little damage in the form of discoloration on the back of the chair, but I think it just gives it some character.
The next step was to find some fabric for recovering the seat, and decide what to do with the frame.
For the frame, I thought I had a couple options- 1) paint the frame a bright, fun color, or 2)clean it up and maybe apply some polyurethane but keep it natural.

In the end, I decided to leave the frame natural, although I did give it a thorough cleaning and a coat of clear poly. It still has some color variation but at least now its all shiny!

I originally had bought a purple/grey patterned fabric from Joann's for this chair. I laid it out on the chair and let it hang out that way for a couple days, and then decided this just wasn't the fabric for the project.
I made a trip back to Joanns, and found this awesome fabric called "Hazel" in navy, from KAS/Richloom. 
Getting the seat off the frame took some work. The two screws in the front were easily removed, but the screw holding it on in the back was striped, and it seemed at one point the hole had been filed with woody putty or something, so that now the hole was smaller than the head of the screw. It took a couple hours and a lot of patience to get the screw out finally!
I won't go into details about recovering the seat, but it involved a staple gun and some patience to get things just right without wrinkles. I think all my hard work turned out well-- see below!


Eventually I will get to the point of showing you the desk set up in my bedroom. Until then, this is the chair in my living room. At this point I haven't recovered the back cushion. For one, its a more involved project including my sewing machine and some cover buttons. But also, I don't think its necessary for making the chair comfortable and usable. 
What do you think? Should I recover the back cushion? 


Thursday, September 29, 2011

Road Bench

First, thanks to everyone who chimed in with ideas about what to do with the canning on this bench. I've finished the bench now!

Here's a reminder of what I started with:

I thought about using some grey fabric I have, but then I saw this piece of bright pinkish-orange fabric in my stash.

I got this fabric at Joann's, probably about a year ago. It was part of their dwell studio line in their 45" home decor fabrics. I think I probably got this for $6/yard.

I removed the old fabric (so gross, you don't want to see) and the accompanying 6000000 staples.I then did my best to totally remove the canning. I painted the frame white, and then started reupholstering.

I was sort of surprised how quickly this came together!

Even Ellie likes it!


(Ignore that small strip of brown. It has been painted now but I haven't had time to get new pics!)


Tuesday, August 23, 2011

Chair Project!

About 2 years ago I scored this little side chair for $5 at a lawn sale. I really liked the size and shape of the chair, and the low price didn't hurt either. The chair itself had definitely seen better days, and the seat itself was in need of some repair. 

The underside of the chair. A mess.

It actually took me quite a while to remove the old fabric- because it wasn't secured with staples which allow some leverage, but with small carpet nails. In addition to the hundreds of nails I had to remove (stabbing myself in the leg with a screw driver in the process...don't worry, I'm ok) this chair was dusty. Yuck. 

Working on removing all those tacks


Close up of where the buttons were...naw, this fabric isn't dirty at all!

What the frame of the chair looked like after I removed the fabric
and the cats helped with a little scratching

Originally I was planning to use a piece of textured grey fabric I scored for about $4 a yard. It was on a clearance table for something like $10 a yard at Joann's, and on that particular day it was 50% off all clearance, AND I had a coupon for an additional percentage off my entire purchase. I didn't have quite two yards, but more than one.


But when I put this fabric onto the chair to see how it might look, I was bored. It looked clean and nice, but just not exciting. So I looked through my fabric stash (yup, I have a stash now) for something that was appropriate to use for this chair, and found some fabric that I have left over from another project that I thought fit the bill.


Much more interesting, right?
 Honestly, this is not a tutorial. But the picture below shows how I used the old fabric to make a template for the new fabric. I literally just traced.


And its done!?


It's hard to tell from these messy pictures (keeping it real, people.) but something wasn't right. The original upholstery was structured, where in this iteration, I just covered it the way you would a dining chair.
I lived with it for a day, but it just really didn't look the way I wanted it to. So I removed the fabric off the seat portion, and made a more structured cover using my sewing machine. I considered adding some pipping, but this project was already dragging on, and I've never done pipping before, so for my sanity, I decided that would be for my next project (which I already have in queue...wink wink).

So here are some final after pictures of the chair, and my cats being total hams. You should know, I took these pictures early in the morning, BEFORE I headed out to work, because the light was good--or at least as good as it was going to be. This is serious, guys.


For the back, I am considering adding some nail head trim, sort of like what's pictured below. Still thinking about it. Not sure yet. What do you think? Should I add nail head trim?
Source 


Monday, August 8, 2011

Since summer is going to start winding down very soon, I thought it was probably time to show you what  I did with my balcony this year.
Since I moved here in August last year, I only had a couple short months to use my balcony and then it was winter, so I was kind of starting from scratch this year.
I did find a nice little table at the end of last year, and repurposed a chair I previously used inside for more comfortable seating.

Just to refresh your memory- above is what my balcony looks like. I have two sliding doors- one in my living room (on the right) and one in my bedroom (the left). This is my first outdoor space and I am totally tickled with it.

I wanted to make the balcony more like an outdoor living room for this summer, and I wanted to think about decorating it like a room in my apartment (for some reason this is a strange concept to me. All my decorating knowledge goes out the window when I go outside)


In making the balcony a little more cohesive, I decided to first recover the little chair I had outside. 
Bad pic, sorry. It's the only one I can find!


This chair came from Ikea and originally had a red seat and flowered back cushions.
My sewing skills have definitely improved since this project, thanks to practice and a new machine!
One of my first sewing projects nearly 2 years ago was recovering it with some green geometric fabric. But this time I decided to go with purple ikat, an outdoor canvas from Joann's. 


The cushion is actually a box cushion, I made it with 3 pieces- top, bottom and the piece that goes around. I put invisible zippers in the pillows, but wasn't able to find a long enough zipper for the seat cushion, so I did it the old fashion way. It's hard to tell because the table is in the way, but this cover fits WAY better than the last. 

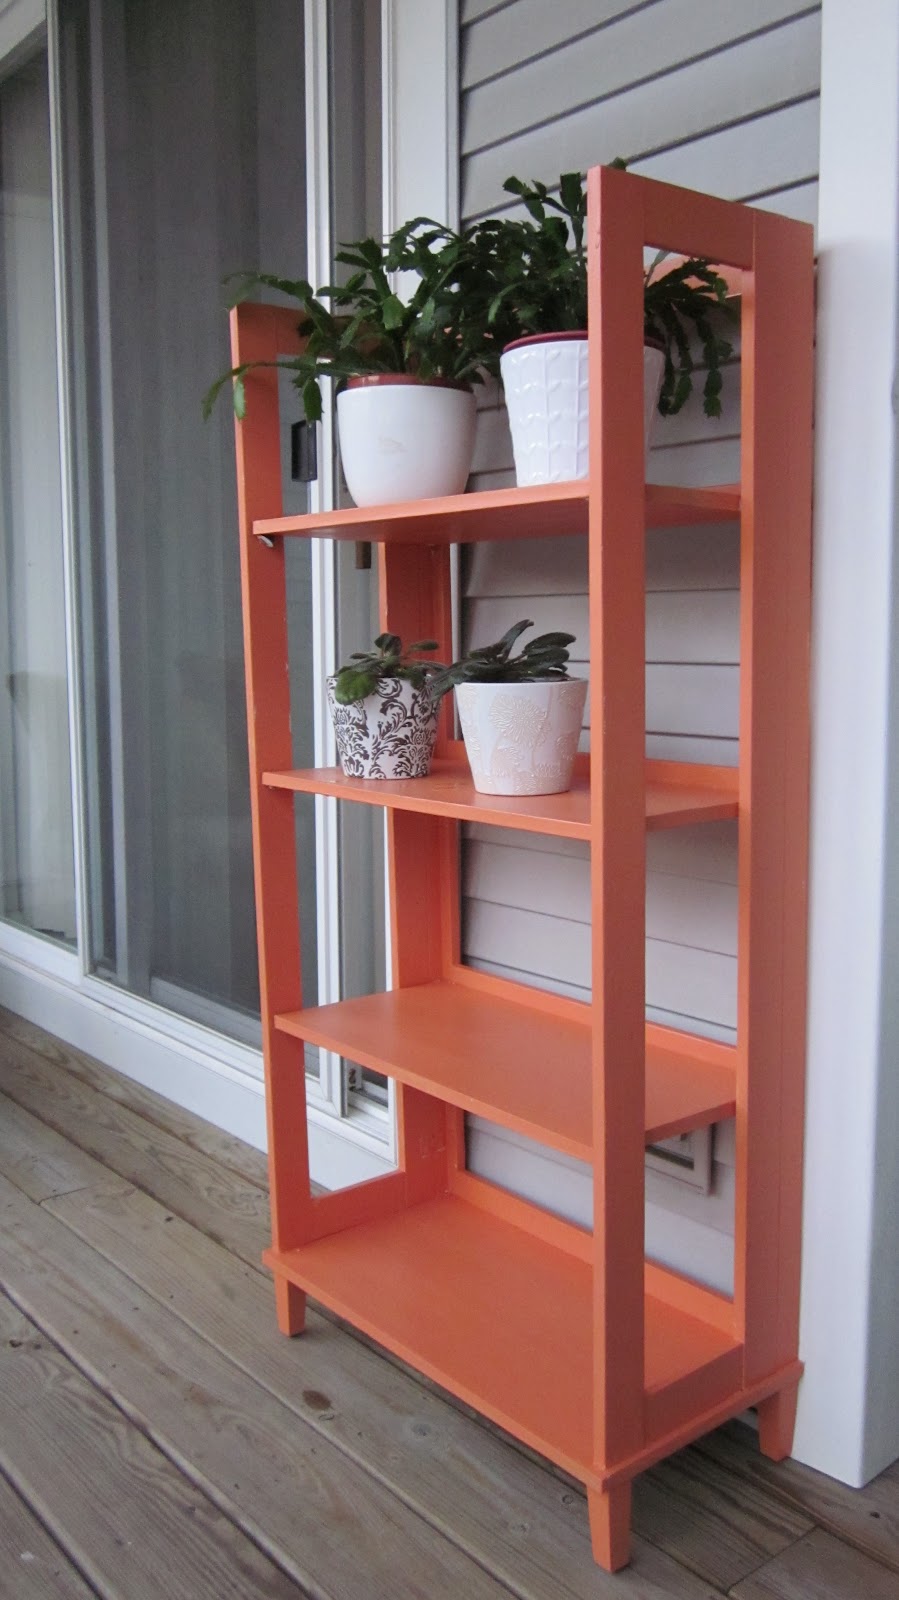
I also decided to re-purpose a bookcase I had inside as a plant stand outside. It was a dark brown color, but had seen better days. I decided I wanted to go with a contrasting color for the bookcase, so I picked out a rusty orange color at Ace Hardware. I only needed one paint sample to complete the bookcase.
Bookcase in previous life (stay tuned for an
update on that chair as well)
Bookcase now!

I put out the plants I had on hand that can handle the outdoors, all of which are in my white planters. Some of the planters are from Ikea, others are from a local gardening store. Overall, I think the white on orange is pretty spiffy, and the purple and orange go together swimmingly. I think I have made good progress with making my balcony feel more incorporated into my apartment and have got a ton of use of out it so far this summer.


I thought about making chair pads for the little bistro set that I have neglected to take a picture of (and its now too dark...), but in the end I decided that might be overkill, plus the chairs are fine as they are.
I would like to do something with that black table I have in front of the chair. Its placement more as a coffee table than a side table has been really convenient, but it doesn't really fit the feel of the rest of the space. Paint it, or make something else to go there?

Tuesday, July 12, 2011

A Dream Come True!

Over the July 4th holiday, I went thrifting, and found my DREAM piece of furniture. A Thomasville Faux Bamboo dresser. For $45. I'm in love. 

Now to decide what color to paint it. 

(PS, Am I the only one who didn't know these dressers are actually vintage? Given the shape it is in and their popularity I figured they were a product of the 1990s, but apparently this baby is straight from the 60's??)

Friday, July 8, 2011

Paint and Repaint

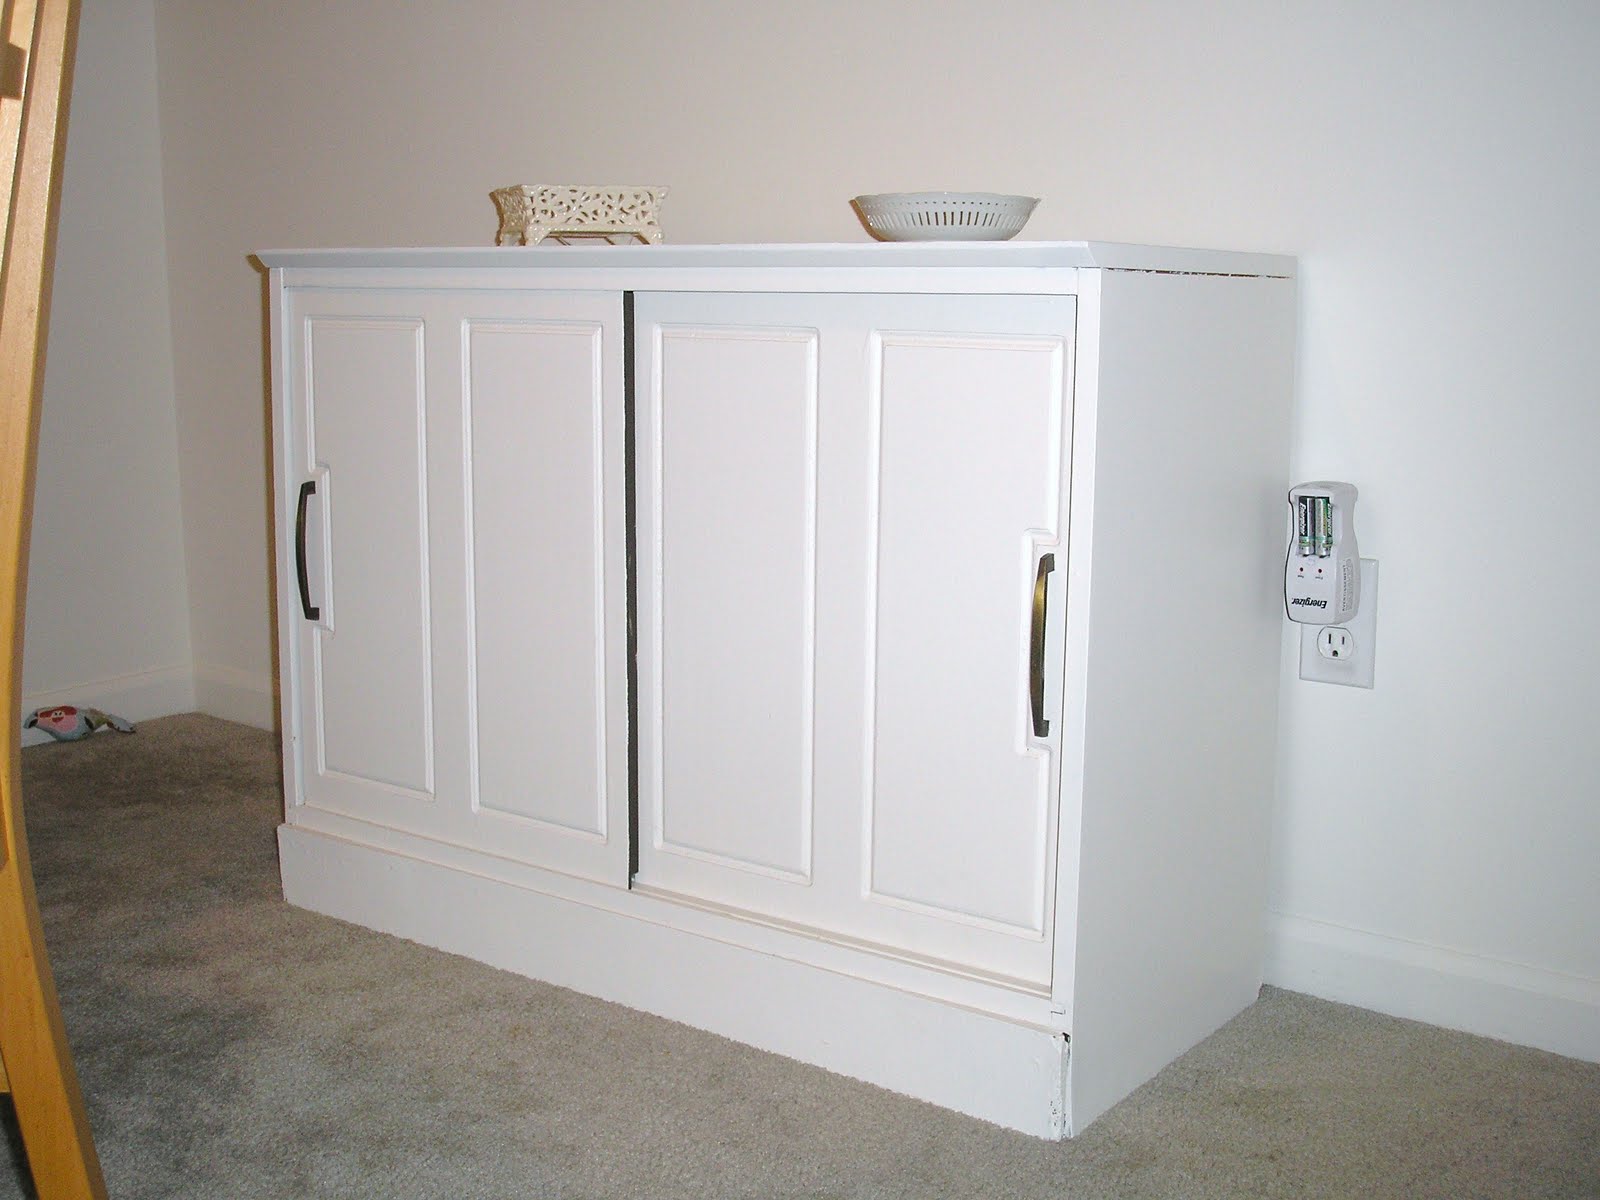
Back in September I bought and painted white a little cabinet for storage in my dining area. Well, it quickly got moved to behind my couch, to serve as a landing strip for mail, keys and other stuff that I have in my hands when I walk in the door.

I decided that while the white was nice, I needed a little punch of color in my life. Looking around at the other things in my living space, I decided turquoise was the color I needed. So I repainted this white cabinet with "La Fonda Turquoise" from Valspar.


I think the color really brightens up the room. It's one of the first things you see as you come up the stairs into my apartment, and it definitely makes a statement. I love it!


 This cabinet is actually small enough that I used just about 1.5 paint samples, making it extremely affordable. I had the first sample in my stash already for a previous project, so that was already paid for. I only had to shell out about $3 for this project!

Linked to:

Friday, April 8, 2011

Couch Pillows

As I explained recently, I got a cream colored slipcover for my couch, but needed to create the covers for the back pillows myself. I was really lucky to find that Joann's cream colored home decor fabric is a near exact match! So I bought yards and yards of it and made covers for the large pillows that make the back of the couch.

For the smaller throw pillows, I wanted to find either fabric or pillows with varying texture. I found this golden pillow at Kohl's on sale for about $10, and immediately knew I had to have it. I then bought the fabric shown, that I thought I was going to really like. But once I made the first pillow, I knew I had made a mistake.
Honestly it took me a while to decide what to do next. I looked at lots of different pillows and fabric but nothing really stuck out to me, until one day when I was putting clothes away or something in my bedroom, I suddenly realized the pillows on my bed would be PERFECT.
So I moved them onto the couch!


I feel like this is a work in progress. I will probably constantly be on the lookout for new textures or even a second pattern to change out the pillows. But for now, I am really happy about the look of my couch. It feels good to learn to work with what I have rather than just buying new.
Before:

During:

 After!


Monday, April 4, 2011

It's Looking Very Pottery Barn in Here

The title of the post is what someone commented when they saw one of my latest projects.
My couch is a big, purple beast. My roommates and I got this couch in college, about 5 years ago now, in Chicago. Its long, wide, comfortable, heavy and was basically a steal from an awesome thrift store in Chicago. It has a pullout bed which has severed us well many times, and its size was excellent for gatherings in college.

Here is my couch in my previous apartment-- I just realized that I haven't ever really shared pictures of the couch in my new apartment!


While this couch is awesome for many reasons, the one thing I have always struggled with is how to decorate around it. It is such a bold color, and being a novice with design, I felt really constrained. I longed for a more neutral couch, and in a perfect world,  I would be able to buy a new couch (perhaps a Karlstad from Ikea), but that just isn't happening now. 
So Imagine my excitement when I stumbled upon a two-piece twill cream colored slipcover at Target, on clearance!! Given the style of the couch--with no real cushions for the back, just the throw pillows, I knew it would take some tweaking for this to really fit my couch, but it was an excellent starting point. I would have loved to make it from scratch myself, but I'm just slightly scared about trying that!
So, after some fighting with the slipcover, she was on my couch. I just needed to make covers for the back cushions and iron.
Yes, Iron. You see those wrinkles? They needed to go. So I ironed the slipcover one morning while it was on the couch. Yup. I ironed my couch. But it looked much better. Even Franklin approved.

Now I just need to finish making covers for the pillows that go along the back, and perhaps pick some patterned fabric for accent pillows!