Monday, July 4, 2011

Another Butterick 5466 Skirt

I've really been on a roll with sewing this summer. And, I wasn't lying when I said I had used this same pattern for more than one skirt. I love, love this pattern. I love the simple straight silhouette and the fact that it sews up incredibly quick, so I can make them in any/every color that I fancy. It also only takes about a yard of fabric, making it inexpensive even with regular fabric, but also entirely likely I will find remnants or clearance fabric to use.

And that's exactly happened with this one. I found just under a yard of this fabric on the clearance table at Joann's on one of those days when everything on clearance was an extra 50% off. I think I paid about $1.50 for the whole piece.  It's a silky fabric, but the gold portions of the pattern are embossed. 


I've already worn this skirt to work once, and I am really liking the interest it adds to my wardrobe. I actually wore it to work with the red shoes I have on in these pictures, a similar white shirt and a navy knit open cardigan I got recently at H&M.


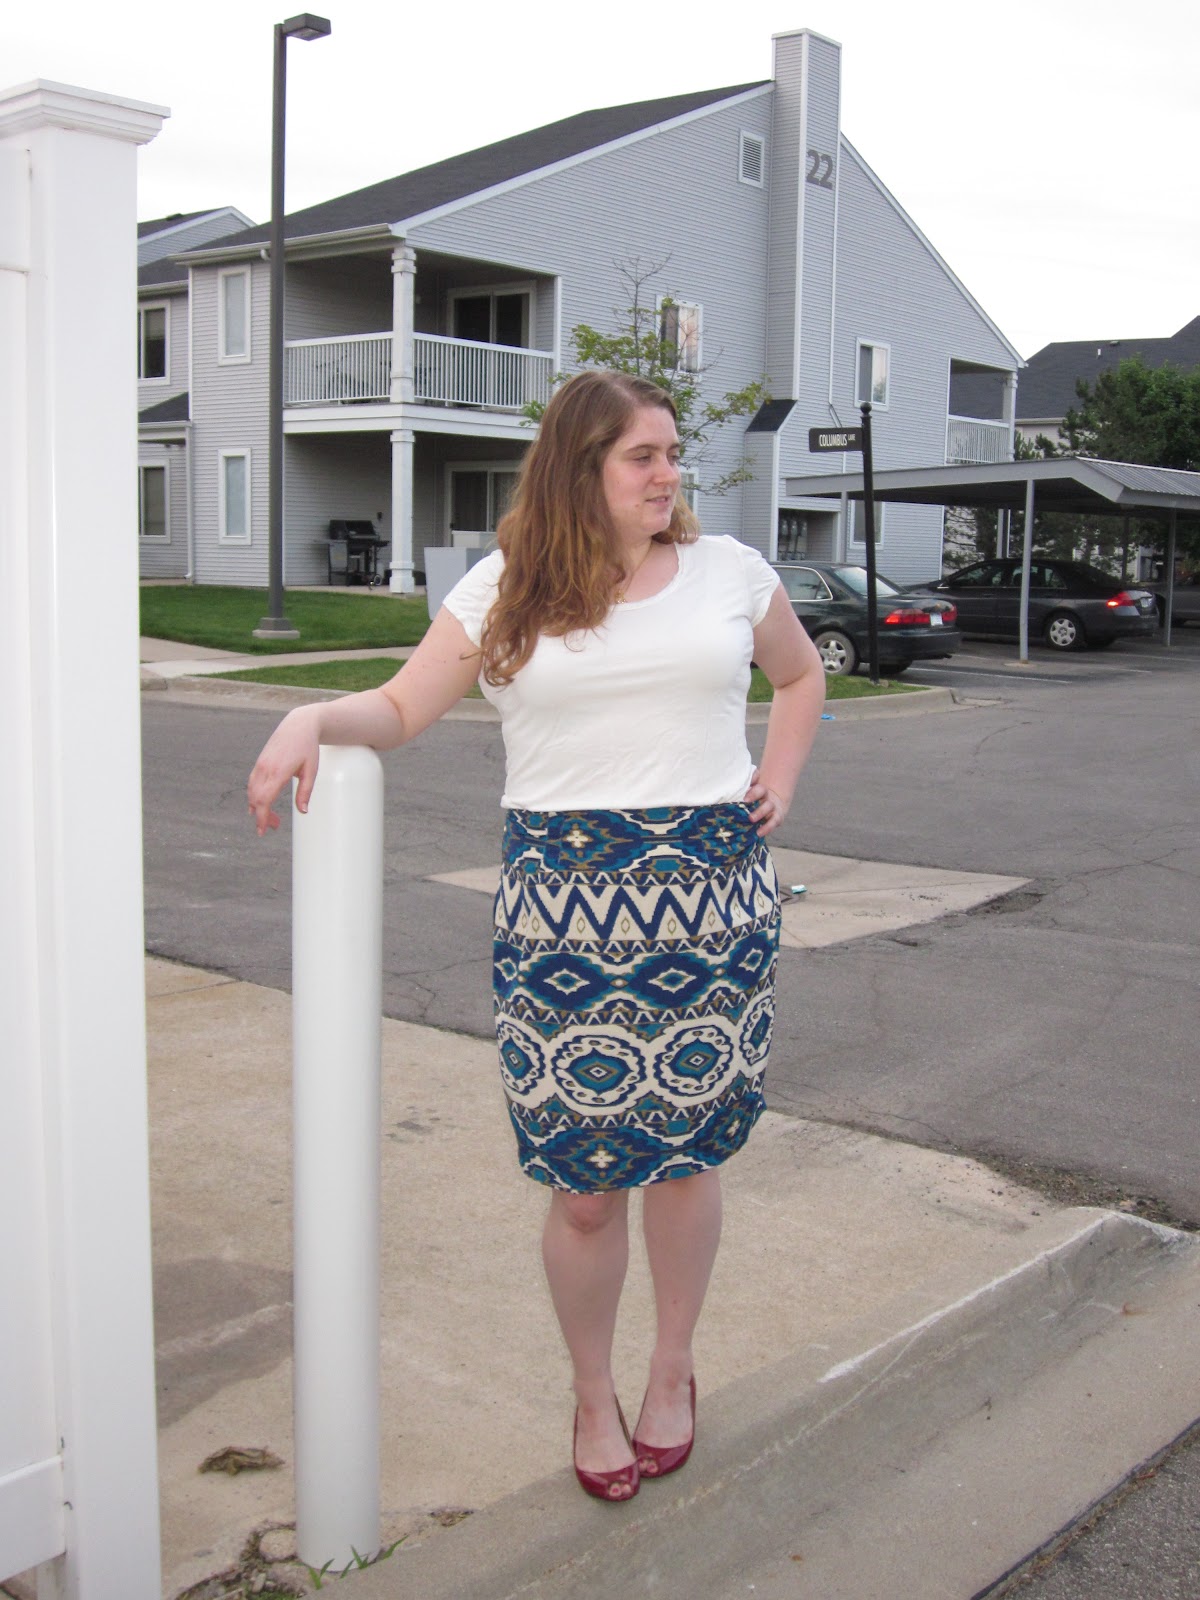
This skirt is also good for hanging out by the dumpster in your apartment complex. I need to learn to pay more attention to my hands when posing. I have quite a few shots that are decent except for my hand in some crazy looking position. :) I guess I am not America's Next Top Model.

Monday, June 27, 2011

Dress: Vogue 1236

I can't remember if I saw someone else that made this pattern, or if I just came across it myself, but either way, it is awesome. V1236 is a DKNY pattern, and probably can be used with about any type of fabric you fancy. The envelope says Seersucker, Chambray, jersey.
V1236
I used a cotton sateen, from the Lisette line at Joann's.

I really liked this fabric upon first touch, so I bought it without a solid plan for use. I think the fabric matches the feel of the dress pretty well, and I am quite happy with the outcome!
The dress includes pockets, and although it wasn't the first time I have attempted pockets, this is the first garment I've actually worn with pockets! I do wish the dress was an inch or so longer.

No, that's not a nicotine patch on my arm. I've been having muscle spasms in my shoulder and was trying those goofy icyhot patches. Results are inconclusive.
I have worn this dress to work, on a weekend for just running errands, and to a BBQ. At work, no one immediately said "oh, did you make that?" which I think is a good thing! At the BBQ, someone asked me where I got the dress, and when I said I made it, she asked me where I sold my clothes! Yikes! While in the future I would love to have an Etsy store or something, for now I am enjoying sewing for myself, at my own pace. 
I do think I will be making this pattern again. I need to play with the fit a bit- I made a muslin of this pattern of the size I would "normally" cut, and it was HUGE! I ended up cutting this dress two sizes smaller, and then shortened the shoulder area a bit because the neckline was too low for my comfort. Perhaps I can cut the top part a smaller size and then taper the skirt out a bit (the whole dress is only two pieces!)? I've never attempted an alteration like that but it seems like it could work. 

Monday, June 20, 2011

Skirt: Butterick 5466

Painting isn't all I do. You may remember that I got a new sewing machine for Christmas this year, and I have spent some time making not only grocery bags and placemats, but also dabbling in clothing. It's been a slow process of learning how to pick patterns that aren't too hard, picking fabric and getting all the little extras that make sewing easier. I've made a couple things in the past with my old machine, with varying degrees of success. 

Following some fashion blogs leaves my wish list for clothing ever expanding and my wallet ever thin. Sewing is really kind of a nice way to acquire some trendy things I see on blogs. This pink skirt is one I made a while ago...as you can see by the snow on the ground. I made it using bright pink bottom weight fabric from Joann's, which I bought for something like $4 a yard (and this particular pattern takes under 2 yards). I definitely bought this pattern on sale, for $1-2. 
Butterick 5466
I made the 4th version, the yellowy one. Full disclosure: Before I cut into my beloved pink fabric, I made a practice version, with the narrow waist band. I'm glad I did that, because I really wasn't a fan. I have since remade that skirt to be sans waistband. 

Don't mind the wrinkles. This is what happens when you wear clothing in real life


I really like this skirt, and I've actually used this pattern twice subsequently. I'll have to post pictures of those skirts as soon as I take them... I have quite a backlog of projects that I haven't photographed. oops.

Thursday, May 19, 2011

Garbage Buffet

I'm not ashamed of finding things near the dumpster. In apartment living, people often leave things that are perfectly good but no longer needed next to the dumpster, sometimes with a "free" sign but often not.
Well, one good Saturday evening I made one such amazing discovery. As I came around the corner in my car, I spotted a promising piece of furniture next to the dumpster. At first I thought it was just a buffet or dresser, but upon a closer look, I realized it was a buffet with a china cabinet on top, two pieces. 
I parked my car quickly and ran back to the cabinet to get an up close look, and it just kept getting better. First, it was in EXCELLENT condition. Never painted, no flaws/dings/scratches. I can't really imagine why someone would have discarded something in this condition, but who knows. And most importantly, IT'S MID-CENTURY! 


After the fun of bringing it to my apartment and up the stairs--which turn, I put some things in the cabinet. When thinking about how I wanted the cabinet to look, I was really inspired by the china hutch that Nicole at Making it Lovely has in her dinning room. The arrangement is really pleasing to look at, and I already have a collection of similar-colored vases and other pieces, which also happen to be white.
Source

I would love to find some colorful fabric to put on the back in luei of painting (because its in SUCH good condition, I can't imagine painting at this point), but I haven't found anything yet. Because I live in an open floor plan apartment, it feels like the colors in my "living room" should coordinate with the colors in my "dinning room", which leaves colors like light blue, grey, pink and yellow. I just need to find the right fabric and then I will commit. 
Here are some pictures of the whole dinning room area with the cabinet. Sorry about the glare from the mirror!


 There was once a mirror on the wall that now has the cabinet, so I had to move it. I decided to rearrange my plates to go around the mirror, as you can see above. I took out 2 plates--my least favorite ones, which also happen to be the smallest plates. I think I am liking this arrangement better than before. It takes up the whole wall nicely instead of not taking up enough of the wall.

Pre-chandy, Pre- china cabinet dinning room, ugh, and an stray chair
Current dinning room!
The one thing that really bothers me at the moment is that the chandelier is NOT centered. I might need to do something about that in the near future.

Monday, April 18, 2011

Painting the Bathroom

So I had a week off about 3 weeks ago-- I got a new job and took a week off between. That week was pretty chocked full of projects in my apartment, and catching up on blog posts. One of those projects that I did was finally painting my bathroom. Since I have a shower curtain that I really love, I wanted whatever I did to work with that, but I also wanted to add a little interest. 
First I thought maybe I would use a stencil, since I have seen some stenciled walls that I absolutely love. But I couldn't decide on a stencil that wouldn't  compete with my shower curtain, or, I got lazy and felt unsure about the stenciling process.
My second idea was to do wide horizontal stripes. I wanted to do similar colors, perhaps a flat version and glossy version of the same color, or just slightly different colors. I've seen this done in many rooms that I absolutely love, for example, 


So I headed to Home Depot to pick out paint colors- planning a nice light tan color in maybe a matte and glossy finish. Well, I found something even more exciting than two different finishes-- I found Martha Stewart's Precious Metals paint! I got a quart of the precious metals color, and then I asked for it to be color matched to a regular semi-gloss color, of which I bought a gallon. The precious metals color is called bone, and I really, really love how it looks in my bathroom. It almost has a pink tint, making it look really warm and ahh I just love it!

I painted the semigloss version of bone as the base coat, and then used blue painters tape to put on the stripes. I wanted them to be big, so that if I was off an inch or so it wouldn't be obvious. I measured the height of my wall and decided to break it into 8 stripes of about 10 inches each, and obviously every other stripe would be painted with the precious metals paint. 

I first painted the base color along the tape to seal it, and then put up the precious metal color. At first I didn't think I was going to be able to tell the difference between the two finishes, but once I stepped out of the small bathroom for a minute and let my eyes rest, I could clearly see the difference.

This is where I moved the towel bar down...
and the aforementioned shower curtain that I wanted to keep
(note to self- close toilet bowl lid before taking pictures next time)


It's extremely hard to take pictures of my bathroom, as its quite small and kind of an L-shape. Also, it doesn't have any windows so regardless of the time of day, the light is poor. It was even more fun to paint it! Lots of  moving things around and strange angles. But I persevered and I'm VERY happy with the results!


Monday, April 11, 2011

My Crap...eh, Craft Room

I have a secret. My apartment has a HUGE closet that I have been using for storage of my crafting supplies, among other things. I haven't made much mention of this room, but see where it is below in the floor plan of my apartment.
This baby is big. It's not labeled on the floor plan, but I estimate its about 8 feet by 6 feet. When I was first moving into this apartment, various family members claimed this room/closet as "their room." It originally served as a graveyard/junk collector for boxes and unpacked belongings while I was still settling into my apartment.
Since then, I have been slowly cleaning and re-organizing, donating things to the Salvation Army with reckless abandon and being brutal about what I keep. I've so far been trying to repurpose the storage solutions I already have. At first I was just planning to keep this closet as it is--a closet. But then I see things like this--
Source

Source
Yes, thats a 16 square foot craft room. My closet is at least twice that size! So surely I can outfit this closet to function better. The one difference between my space and the above space is the window. There is no window in my closet. Also, there are no outlets. I think the lack of outlets is ok-- as there are two just outside the room, so the use of an extension cord when necessary will suffice.
Here are some pictures of the room as it looks currently (or recently, at least.)
Paint stuff in the plastic drawers, extra blankets in the dresser, sewing stuff on top of the dresser

Random collection of things in the metal cubes

Fabric collection (organized by color!)

Paint


So what do I do with this room? Obviously, it needs to function still as a closet. It would be awesome to put in some sort of work area, maybe where the fabric is stored currently. This is a project that I think I'm going to go slow with, so I can do it right.

Any suggestions for me? Remember, I rent, so I can put some things on the walls, but not make other big alterations. Also, I'm interested in reusing what I have but would love a unified look. I feel like I have done a good job thus far of using the available space, but I really need to take advantage of the vertical space.

Friday, April 8, 2011

Couch Pillows

As I explained recently, I got a cream colored slipcover for my couch, but needed to create the covers for the back pillows myself. I was really lucky to find that Joann's cream colored home decor fabric is a near exact match! So I bought yards and yards of it and made covers for the large pillows that make the back of the couch.

For the smaller throw pillows, I wanted to find either fabric or pillows with varying texture. I found this golden pillow at Kohl's on sale for about $10, and immediately knew I had to have it. I then bought the fabric shown, that I thought I was going to really like. But once I made the first pillow, I knew I had made a mistake.
Honestly it took me a while to decide what to do next. I looked at lots of different pillows and fabric but nothing really stuck out to me, until one day when I was putting clothes away or something in my bedroom, I suddenly realized the pillows on my bed would be PERFECT.
So I moved them onto the couch!


I feel like this is a work in progress. I will probably constantly be on the lookout for new textures or even a second pattern to change out the pillows. But for now, I am really happy about the look of my couch. It feels good to learn to work with what I have rather than just buying new.
Before:

During:

 After!


Wednesday, April 6, 2011

Bathroom

I'm not going to lie, I'm a pretty brazen tenant. Take this example for instance- The towel rod in my bathroom. It's way too high! It was nearly half way between the top of the toilet and the ceiling, meaning I couldn't put my shelves up above it. Tres annoying. Whats a girl to do?

Well, get out her screw driver and move that sucker!

Before. Too High!


After

After: Just right!
Next step is to spackle the holes and paint over them so you can never tell they were there at all.

Monday, April 4, 2011

It's Looking Very Pottery Barn in Here

The title of the post is what someone commented when they saw one of my latest projects.
My couch is a big, purple beast. My roommates and I got this couch in college, about 5 years ago now, in Chicago. Its long, wide, comfortable, heavy and was basically a steal from an awesome thrift store in Chicago. It has a pullout bed which has severed us well many times, and its size was excellent for gatherings in college.

Here is my couch in my previous apartment-- I just realized that I haven't ever really shared pictures of the couch in my new apartment!


While this couch is awesome for many reasons, the one thing I have always struggled with is how to decorate around it. It is such a bold color, and being a novice with design, I felt really constrained. I longed for a more neutral couch, and in a perfect world,  I would be able to buy a new couch (perhaps a Karlstad from Ikea), but that just isn't happening now. 
So Imagine my excitement when I stumbled upon a two-piece twill cream colored slipcover at Target, on clearance!! Given the style of the couch--with no real cushions for the back, just the throw pillows, I knew it would take some tweaking for this to really fit my couch, but it was an excellent starting point. I would have loved to make it from scratch myself, but I'm just slightly scared about trying that!
So, after some fighting with the slipcover, she was on my couch. I just needed to make covers for the back cushions and iron.
Yes, Iron. You see those wrinkles? They needed to go. So I ironed the slipcover one morning while it was on the couch. Yup. I ironed my couch. But it looked much better. Even Franklin approved.

Now I just need to finish making covers for the pillows that go along the back, and perhaps pick some patterned fabric for accent pillows!