Showing posts with label crafts. Show all posts

Sunday, August 28, 2011

Sunburst Mirror


I don't need to tell you that sunburst mirrors are a hot decor item these days, as you've likely seen them all over blogland and in stores. So I'll just cut to the chase. 


I made my own sunburst mirror, using some bamboo skewers I picked up at the grocery store, silver spray paint, a small mirror from a craft store, some cardboard and hot glue. 
I started by spray painting the skewers silver. I then used my little hand saw to cut the skewers to various lengths. I cut off the pointed ends of the skewers, with the intention of having that end glued to the back of the mirror. 
Once the skewers were cut, I arranged them in somewhat of a pattern around the back of the mirror. I started by using a pencil to draw lines cutting the mirror into 8ths on the back, and put my longest skewers along those lines. I then filled it in by placing a skewer in the middle of each remaining section, while varying the lengths, really by eye. At this point I also giggled about how in theory I would need an infinite number of skewers to fill in my mirror. Perhaps some of you will appreciate this too.:)
Lastly I glued the cardboard circle that I made by tracing my mirror (before gluing on any skewers) over the skewers. I thought this would make it easier to hang.


It looks nice on the wall to the right as you come up the stairs to my apartment. The walls in that area are very large and very empty, so this is a good step towards adding some interest there.

HookingupwithHoH

Sunday, August 14, 2011

Glittered Heels

For a while, I've been obsessed with glittered shoes. Kitten heels, pumps, open toed pumps...Kate Spade, Jimmy Choo, Mui Mui....
The problem with this is I can't afford to buy a pair of Kate Spade shoes...but even more, I'm unsure how practical they will be for "everyday" wear, which is the test I put all of my clothing and shoes through. 

Glitter Heels

Christian Louboutin platform pumps
$895 - bergdorfgoodman.com

Christian Louboutin glitter pumps
$805 - mytheresa.com

Miu Miu glitter pumps
$476 - bluefly.com

Jimmy choo shoes
$495 - shirise.com

Betsey johnson shoes
$119 - betseyjohnson.com

High heel shoes
$120 - topshop.com


JustFabulous glitter pumps
$50 - heels.com

I've seen a couple DIY glittered shoes around the internet, and I decided to try it myself.
I had a pair of shoes I felt were good candidates, but I liked them as is too, so I set out on a hunt for affordable shoes to glitter. I went to the Salvation Army, and as luck would have it, I found an awesome, brand new pair of black opened toe ankle strap pumps. 

I bought them, but by the time I got home, I was already unsure that I wanted to glitter them, as I loved them in their current state. Also, the ankle strap and heel height made them slightly more dressy than I was intending. So, I decided to glitter the original heels and keep the "new" ones I had bought black! The shoes I ended up using are from Target, from a couple years ago. They're comfortable and I actually have them in two colors. 

All you need for this project is a pair of shoes, some glitter, modge podge, a little newspaper and some clear enamel spray paint.
 It was beautiful out that day, so I decided to work outside on my balcony.


Mix some modge podge and glitter- I used Martha Stewart's smokey quartz glitter, bought at Michael's for $3.99. I really just eyeballed it, no exact recipes here.

First Coat 
It took me about 4 coats to achieve the level of uhh...glitteirness that I wanted. As you can see, I also glittered a barrette I had laying around. I find when I have glue and glitter mixed, and even a little bit left over, I get giddy looking around trying to find something else to glitter.


I stuffed some newspaper into the shoes to protect the insides, and then sprayed a coat of clear enamel that I bought at Ace Hardware, also for $3.99.


Voila! The finished project. Prepare yourself, friends. I will be wearing these around town starting tomorrow morning!


Monday, April 11, 2011

My Crap...eh, Craft Room

I have a secret. My apartment has a HUGE closet that I have been using for storage of my crafting supplies, among other things. I haven't made much mention of this room, but see where it is below in the floor plan of my apartment.
This baby is big. It's not labeled on the floor plan, but I estimate its about 8 feet by 6 feet. When I was first moving into this apartment, various family members claimed this room/closet as "their room." It originally served as a graveyard/junk collector for boxes and unpacked belongings while I was still settling into my apartment.
Since then, I have been slowly cleaning and re-organizing, donating things to the Salvation Army with reckless abandon and being brutal about what I keep. I've so far been trying to repurpose the storage solutions I already have. At first I was just planning to keep this closet as it is--a closet. But then I see things like this--
Source

Source
Yes, thats a 16 square foot craft room. My closet is at least twice that size! So surely I can outfit this closet to function better. The one difference between my space and the above space is the window. There is no window in my closet. Also, there are no outlets. I think the lack of outlets is ok-- as there are two just outside the room, so the use of an extension cord when necessary will suffice.
Here are some pictures of the room as it looks currently (or recently, at least.)
Paint stuff in the plastic drawers, extra blankets in the dresser, sewing stuff on top of the dresser

Random collection of things in the metal cubes

Fabric collection (organized by color!)

Paint


So what do I do with this room? Obviously, it needs to function still as a closet. It would be awesome to put in some sort of work area, maybe where the fabric is stored currently. This is a project that I think I'm going to go slow with, so I can do it right.

Any suggestions for me? Remember, I rent, so I can put some things on the walls, but not make other big alterations. Also, I'm interested in reusing what I have but would love a unified look. I feel like I have done a good job thus far of using the available space, but I really need to take advantage of the vertical space.

Saturday, December 4, 2010

Christmas presents

Since the holiday season is officially "on", I've started thinking about what I will be gifting to my family this year. I have at least 8 people to consider for gifts, with others that will get smaller gifts. And this includes a range of people--from my grandmother to my 13 year old brother. In years past, I have often purchased things from the school I was at, but now that I'm no longer a student, thats not an option (plus I'm over it anyway.)
My family tends to gift eachother very practical things- my mother runs a daycare and goes through a lot of kitchen linens, so my gifts for her almost always include dishtowels and potholders (which might sound lame but she always appreciates them), my stepdad is a contractor and often works outside even in the winter, so lined carhart pants and laying pieces are key for him, as well as good tough work gloves.

Regardless, this year I don't want to do my "normal" Christmas thing. Last year I made candles and gave them to all my female family members, and this year, I want to take it a step further, and make ALL of my gifts. And apparently I'm not the only one! Over at (never home) maker, Ashley writes about how she would like to attempt a homemade Christmas (and also how shes otherwise decluttering her holidays) in this post titled Season's Greetings& Farewell to Stuff.

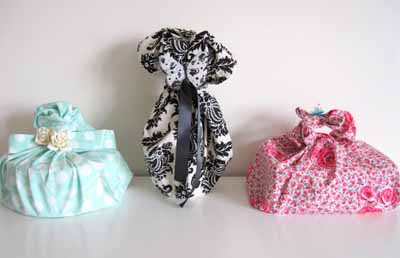
Along a similar vein, many people are suggesting that people wrap their gifts this season in reusable shopping bags. Sarah Richardson (of Sarah's House on HGTV) recommends this, and I see lots of great ideas at Sew, Mama, Sew! for how to make reuseable bags into pretty packages. I am planning to make use of these ideas--to start, I will make a bag like this
 to hold each gift. I made this bag using a pattern also from Sew, Mama, Sew!, which is super easy. You can find that pattern here: Classic Tote Tutorial

Then I will pretty them up even more, but using some of the ideas they blogged about yesterday. You can find the whole post here, but here is a picture that sums it up:
From Sew, Mama, Sew!
Since some of my family members actually occasionally read my blog, I can't go into real details yet about some presents. But I can tell you that I've so far used beads, yarn, ribbon, wire, fabric, and towels. Also I have already done a post about how while I'm home for Christmas, I will be seriously re-working my mom's kitchen (with only a little help from her). 

The trickiest part will be making something for my 13 year old, soon to be 14, brother. His top request is a video game, and while I am proficient in programming I am not a video game programmer!! (But wouldn't that be awesome?) If you have any ideas about what I could make for a 13/14 year old boy who likes camping, hunting and history, please, let me know!!

So what about you? Will you make some or all of your gifts this year?

Sunday, November 21, 2010

Some Winter Decorations

I can't really stomach calling this project "Christmas decorations" this early, and honestly, they're not for Christmas--they're for winter. I really like those feathered "trees" and wreathes that I've seen at stores the past couple seasons--Michaels, Joanns, even Target. Despite how much I like them, I just couldn't stomach the price these stores wanted. I've seen remakes of the wreath, but I don't recall any of the trees.

One day while browsing at Michaels, I came across some cardboard (Paper mache??) tree forms.
I bought three of them, because we all know to decorate in odd numbers, right?? (also, ignore the mess in the background of that picture.)
I also picked up two bags of white feathers. At first I was thinking maybe I would do three trees all with feathers, maybe of different colors. But then I decided to go in another direction, and do all silvery/white trees. Thus, I also picked up some white glitter and some silver strung beads meant for Christmas trees.
When I got home I gave them a quick spray with white spray paint, just in case the color shows through for some reason. 
Making the one with glitter was rather easy: cover that thing in glue and then shake on the glitter! 
The next one I tackled was the feathered one. I started at the bottom of the tree and hot glued the feathers around and around, moving up after I've finished a row. As you can see, Franklin was very interested in what I was doing. Or, he thought the feathers were a toy.
The feather tree used a surprising amount of feathers. I used about a bag and a half. 

Lastly I tackled the large tree. This one took the longest time and the most hot glue to complete. I simply wrapped the silver beads around, and around, and around, gluing gluing gluing. 
As you can see, when I started at the bottom of the tree, I wasn't paying a lot of attention to how the beads were stacking. Part way up I started squishing them together so there was much less white space showing. If I were insane and had tons of free time, I might try to remove all the beads and redo them. This tree took a lot of beads. I used three strings, all of which were about 6 feet long each. But, they are relatively cheap. I got two strings at Ikea, and the third at Target.

All together, I think they look pretty nice. My plan is to use them on my table, with some votive candles around them. Perhaps I will put this whole arrangement on a mirror to reflect the flame and silver even more.


Cost breakdown:
2 small trees: $1.99x2= $3.98
1 large tree- $2.50
glitter: unsure exactly- $2 maybe?
feathers- $1.99/bag x2= $3.98
silver beads- 3 strings at $2 each= $6
Total: $18.46 for THREE trees

vs ONE feathered tree on Amazon: 19.99 (and they claim this is 50% off)


Friday, October 29, 2010

Halloween Decorations

Last year I wanted glittery pumpkins to use for decorations. I wanted small ones that I could use in a vase. I couldn't find any, so I ended up making them myself.  You can read more about that process here.

The Supplies: All from Michaels


The finished product


Well this year I wanted to make a slightly different arrangement with a larger vase. The number of pumpkins that I glittered last year don't fill the vase that I want to use this year, so I drug out my glitter and glue (I had a handful of un-glittered pumpkins and pine cones left over...)
How the arrangement looks this year before the additional pumpkins


Got the old supplies out again!


 You can see this is a project I've been working on on my coffee table, while watching TV. I sure do love Martha Stewart's glitter. I got this jar at Michael's last year when I first started this quest for glittery pumpkins.
This really is the extent of my Halloween decorating. What can I say? I don't have kids, and I spent most of my time in the lab. I do like that this arrangement can hang around longer than just Halloween, closer to Thanksgiving.