Friday, October 29, 2010

Halloween Decorations

Last year I wanted glittery pumpkins to use for decorations. I wanted small ones that I could use in a vase. I couldn't find any, so I ended up making them myself.  You can read more about that process here.

The Supplies: All from Michaels


The finished product


Well this year I wanted to make a slightly different arrangement with a larger vase. The number of pumpkins that I glittered last year don't fill the vase that I want to use this year, so I drug out my glitter and glue (I had a handful of un-glittered pumpkins and pine cones left over...)
How the arrangement looks this year before the additional pumpkins


Got the old supplies out again!


 You can see this is a project I've been working on on my coffee table, while watching TV. I sure do love Martha Stewart's glitter. I got this jar at Michael's last year when I first started this quest for glittery pumpkins.
This really is the extent of my Halloween decorating. What can I say? I don't have kids, and I spent most of my time in the lab. I do like that this arrangement can hang around longer than just Halloween, closer to Thanksgiving.


Thursday, October 28, 2010

Entryway

While my apartment is technically on the second floor, my entrance is on the first floor, with a tiny little foyer and the staircase that goes up to the rest of the apartment.  At the top of the stairs is the large, bedroom-sized closet. When I originally moved in, I put all of my coats and hats and mittens in this closet...however it very soon became apparent that this setup wasn't going to work. The place to hang things in this closet is in the back. And the space between the back and the door is usually filled, or at least not always easily traveled.
  
Since I'm usually in a rush to get out the door in the morning, and it will only get worse as the winter comes, I knew I needed to do something else. I first tried putting my coat tree in the "nook" behind the door in the entryway downstairs, but it didn't work for me.

Before: Leftover plywood from my headboard,
my sewing machine and testing the coat tree out

See how tall the space is??


I decided what I needed to do was put in a rod across the nook to hang coats on, and put a shelf above the rod to store my hats, mittens, scarfs, etc. 

I decided I wanted to go the 'built in' look, so I got some wood to use as supports for the sides, and a precut shelf. I put the trim on the three sides of the nook, and then set the shelf on top and screwed it in. I'll be honest, this didn't turn out exactly as pretty as I imagined, but it is working out amazingly.
With the shelf
Next I need to get rid of the plywood thats left over (anyone want a headboard??) and perhaps do some other decorating up the stairway. I actually have another project in progress for the entry way, and I'll leave you with this teaser:


HookingupwithHoH


Sunday, October 24, 2010

Welcome To My Home, Volume 3: Ikea Trip

I've slowed down on the number of projects I've done recently, perhaps because of the cooling weather. This past weekend, however, I made a trip to Ikea. Shopping with people is fun, but when I really want to do some serious shopping, I want to do it alone so I don't feel any pressure to be on someone else's schedule. In other words, I like to look at everrrryything. Maybe twice.
So this weekends trip to Ikea was my first solo trip, and it was quite fruitful! I picked up a few things that I've had my eye on for a while, and some things I hadn't planned on, along with the main reason for the trip: Kassett boxes. I won't tell you what I'm doing with these boxes yet, but one of my recent posts has a rather large clue.
Here's a visual of the goods I came home with:

In addition to all the Kassett boxes, I got some items I have seen in other people's spaces and really wanted. For example, the grey striped tray. I'm using it on my landing strip as a place to put my keys/phone/whatever is in my hand when I walk in. It's a really cute tray- I wish larger sizes were available.
I also picked up some of those basic white "FARM" vases that I see everywhere. I've looked at them a couple times in the store but never ended up taking them home until this time.
The orange candles will be appearing with my pink glittery pumpkins, and the silver bead trim is something I'll use definitely for decorating for Christmas, but maybe elsewhere too!

Friday, October 22, 2010

Real and Imagined Projects

Recently, I haven't had time/energy/resources to complete as many real projects as I would like, but that doesn't mean I haven't been completing many imaginary projects!
Sometimes I browse craigslist looking for gems that can be had for next to nothing (or free) which can be easily transformed into something priceless. Often I do this at home while watching Grey's Anatomy or something on HGTV, but sometimes I do it while eating lunch at work (shh, don't tell my boss!). My latest session of trolling craigslist provided me with several projects I'd love to tackle in real life.

First, I found this little guy for $30:
 Which I think with some bright paint could look a lot like this guy from Ikea:
Trollsta side table from Ikea, $79.99
Which runs you about $80. So for $30 plus a small amount of paint  you can have a Trollsta-style side table of any color you'd like! And then you still have some money left over for a new pair of shoes.


The second gem I found was this storage ottoman/bench:

This guy is also listed for $30. I think with some reupholstering (and maybe some tufting on top... I love it), it could be an awesome alternative for these:
Kivik footstool from Ikea. Listed for $129-$179

Tangerine Storage Bench from Target, $179
My wild guess is that 2-3 yards of fabric would be enough to cover this baby, and stores like Hobby Lobby and Joann's have decent selections of appropriate fabrics in all different colors and patterns. And you can always find a 40% off coupon for those stores. Say you pick a fabric that is $20 a yard, and you need three yards, your total for this item is still only $90 ($30 for the stool and $60 for the fabric)--you're still saving $80 over these options I've shown above. 

This is really just the tip of the craigslist-iceburg. In my next life, instead of spending my days as a biostatistician researching kidney disease, I will be rehabbing craigslist finds and selling them in my shop.


Wednesday, October 20, 2010

Office area in Bedroom

Since moving from a two bedroom apartment to a one bedroom, things have shifted. For example, I can no longer use my second bedroom as my office (on the flip side-- I am not longer a student and don't need to spend hours at a dedicated desk with all my textbooks around me). Thus my desk has ended up in my bedroom, which is OK with me. However, along with the loss of my office was all the storage space that my office offered-- a closet, several bookcases and most importantly the option to just close the door if it wasn't looking as pretty as I wanted.


Here is a reminder of what my current desk area looks like (when artificially clean)... 
It normally has mail and other stuff on it, and also you can see I still need a chair, since I have a dedicated dining space in this apartment instead of an eat-in kitchen, so I no longer need to store my extra dinning chairs in other places!


 Now that my office is sort of out in the open, I need to put more effort into organizing it, and organizing it with pretty tools. Here are some inspirational photos I've come across.

From http://www.younghouselove.com/2010/10/house-crashing-inspired-inexpensive/
From http://unclutterer.com/2010/01/22/workspace-of-the-week-splendid-shelving/ 
From http://makingitlovely.com/2008/10/27/studio-tour/ 

From http://makingitlovely.com/2008/10/27/studio-tour/ 
Get what I'm going for? Any suggestions on how to make my office space awesome?

Tuesday, October 12, 2010

Inspiration: Fur for the bed

The temperature is definitely changing in Michigan, which is making me think about ways to make my bed cozy and warm for the winter. I have several pictures saved in my inspiration files of fur throws and pillows on beds. After looking at these pictures, how could you not want a fur throw or pillows for your bed?

The pic below is actually from Kourtney Kardashian's bedroom. She has matching pillows and throw. Fabulous.


Here are some possible places to get fur bedthings:
 
Throw from ZGallarie, another color also available (I believe this is the one on Kourtney's bed: $99

Throw from Pottery Barn: Comes in 3 colors: $149

 
Another throw from Pottery Barn: Faux-Sheepskin throw on sale for $79! Ok, this isn't really "fur," but I've had the pleasure of using this blanket and it is wonderful. They also have matching pillows:


There are many options on Overstock, and I've also seen less expensive throws at places like TJMaxx. And if you still can't find something you like, I'm sure most fabric stores carry faux fur by the yard, which could easily be used to make pillows and a throw yourself. Hmm...that gives me an idea...

Monday, October 11, 2010

Apple Crisp

Any of you that I know in 'real life' might also know my grandma's apple crisp recipe. It's yummy, yummy, yummy and one of my favorite things to make in the fall. Yesterday on Deliciously Organized, Carlee posted about apple picking and wanting to try an apple crisp, so I commented with my grandmother's recipe.
Well, she tried it and liked it so much, she wrote a whole post about it!
She illustrated it with beautiful pictures as well. Go check it out!


http://deliciouslyorganized.blogspot.com/2010/10/apple-crisp.html

Tuesday, September 28, 2010

New purchase and more painting!

At the same time that I was re-vamping the table on the left side of my dinning area, I was looking for a buffet of some sort to put on the right side of the dinning area. I've seen some amazing redos recently that have fueled my fire. For example, this one from Brooke at The Crafting Chicks-
Before:

After:
 Amazing, right??

Unfortunately, as much as I would love a full china cabinet to redo  I simply don't think I have the space for it without making my dining area feel cluttered. And I really don't want a cluttered space. So instead I was looking for a buffet without a hutch.
In a perfect world, I would find a gorgeous mid-century modern buffet with lovely hairpin legs...but I'm also working on a budget. If I had hundreds of dollars to work with here, this would be no challenge.
I also would prefer something that is actual wood.
Well, I lucked out one day on an impromptu trip to a thrift store I have never been to. It's called the Ann Arbor PTO thrift store, and as you might guess, it's run by the PTO for the school district in Ann Arbor. All of their proceeds go to the school. So in addition to getting awesome thrifty goods, I'm supporting the schools.
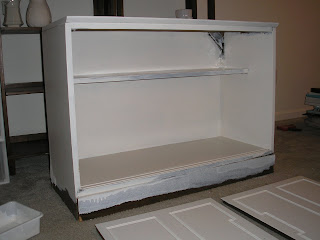
I found a small (perhaps smaller than I would like) cabinet marked "tv stand" for get this-- $10. It was kind of rough looking, but if I know anything, its that a couple coats of paint can seriously change the look of ugly furniture.
Here she is, minus the doors but with all the dust
For $10, I couldn't resist, and she was immediately put in my car. On the way home I stopped to get some important supplies--some primer (Kilz, of course), a paint brush and some new rollers. I got home and immediately got to work cleaning, sanding and priming this baby. Just the primer was an improvement. For the paint-- of course I turned once again to my $5 gallon of bone white. I think I may actually only get one more project out of this gallon, and then I will have to buy another. I suppose I have got my moneys worth.
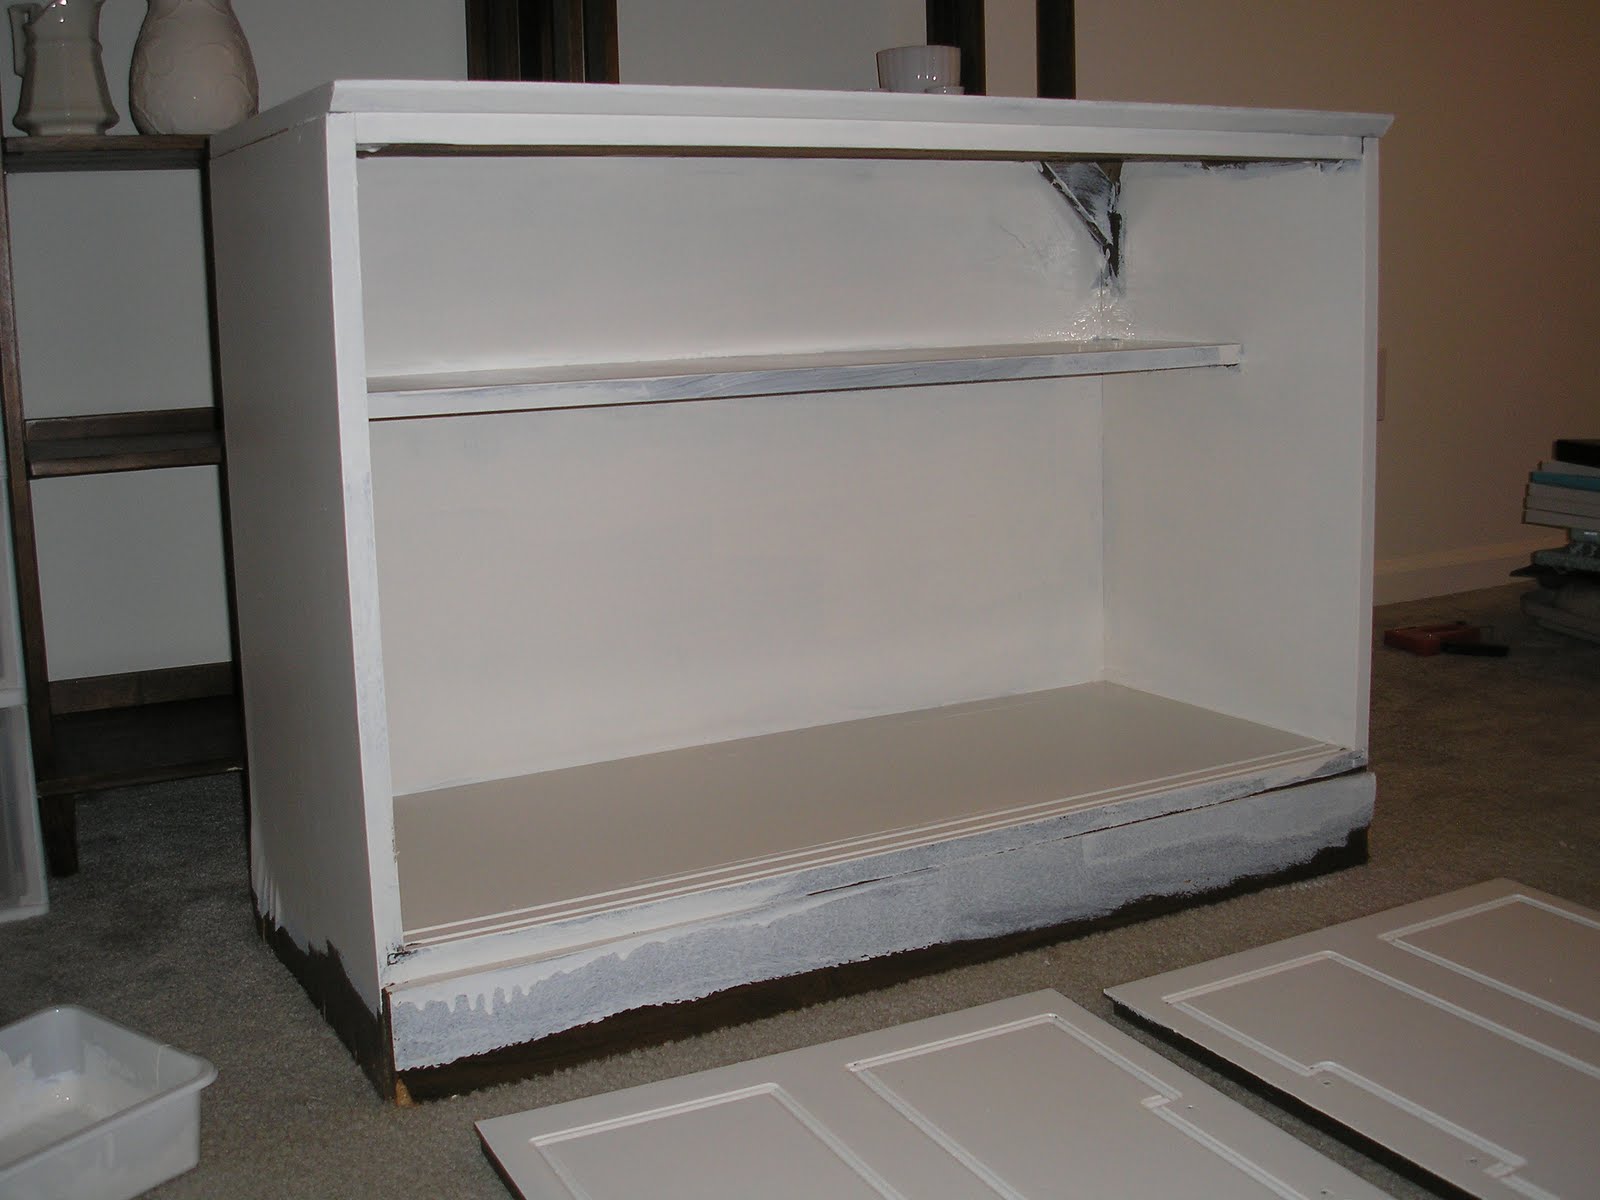
Painting progress
The Doors

The Finished product:

The hardware is the original hardware, I just cleaned it up a little. I can see maybe I need to paint the side of the door there, and perhaps some caulking around the top there.
Given how short it is, I'm playing with the idea of adding small legs (about 3 inches) to the bottom to raise it more to a true "buffet" height. Any thoughts on that idea?

Friday, September 24, 2010

Funny

Have you ever heard of Wordle? I guess I had, but I had never played with it until today. I submitted my blog URL to make the word cloud, and this is what I got:


Wordle: my blog


Funny, right? I guess I talk about paint a lot.

Thursday, September 23, 2010

Fixing an Old Project

Last year I bought this great side table at the Salvation Army for cheap that I intended to use in my office (see that post here). 
Original condition. It had significant water damage and lots of drawings on it.

Well, it never made it there-- I ended up painting it white and using it as a side table in my living room.
After the paint, before the poly
 At the same time I polyurthaned the top of my desk, I decided to poly the this table. Well, I don't know if I put on too much, or if this is just how poly works on white paint, but it turned it yellow. Yucky yellow that behaved very strangely with the sun. 
The yucky yellow, just after I started painting

Yucky yellow
Given my recent spat of painting things with my awesome $5 gallon of white paint, I decided I should sand down this table, and then repaint it with the bone white $5 paint. And I am SOOO glad I did! It looks so much better.
Another note-- While I was at Lowe's buying some more sandpaper (I've been using tons of it recently) (no, I don't have a mouse sander yet, I hope Santa is reading this!) I saw paintbrushes. And not just any paint brushes, but Purdy paint brushes. I have read about these on other blogs but their price scared me away a bit- I tend to buy many cheap brushes and just throw them away. I'm sure my projects have suffered as a result. Well, I decided to buy some Purdy brushes because they had a really good deal--a pack of three brushes- 1 inch, 1.5 inches and 2 inches for less than $20! If you were to buy them separately, just the 1 inch and 1.5 inch brush would have been more than what this pack of three was! I think it was a sign that I am meant to use these brushes. My overall impression is that they are excellent. Very good paint coverage and they cleaned easily. I also liked that the handle is wood. My old arthritic hands wouldn't mind thicker handles, but they'll live.

Ok, back to the point here. The table now looks awesome.


See! No more yellow!

The bad news is that I also used poly on my desk. And it turned the same yucky yellow. This weekend I am planning to sand that down and repaint. I haven't decided if I will repaint with the original color (called white mocha), since I only put poly on the top, or if I will go crazy and repaint the whole desk with bone white. I'm kind of torn--the bookcase in my bedroom is bone, but painting the whole desk is a big undertaking. Since the two pieces aren't next to each other, I can't imagine anyone will notice unless I tell them...


Shared on Remodelaholic