Sunday, April 25, 2010

Dwell Studio Love

Dwell Studio is a company that designs bedding and other awesome home goods. You might recognize the name because Target carries a line of their designs. They're known for their modern patterns and amazing colors. Here's a couple of their patterns that I love:


So imagine my delight when I discovered this morning that JoAnns fabric is now carrying a collection of Dwell Studio fabrics:


I'm already planning some projects that could utilize these fabrics. Particularly the fabrics that have green in them...stay tuned.

Kitchen Cabinets

The kitchen in my apartment came complete with some questionably painted cabinets. It was a good attempt at making them look clean and neutral, I'm sure, but it just wasn't doing it for me. The brown was too dark, and it looks they haven't been cleaned in 10 years despite that I do it often. So I decided it was time to paint them. Many people in my complex paint their walls, management doesn't seem to care, so I decided they wouldn't care if I painted my cabinets. Even if they do care, my security deposit was next to nothing. I went to my favorite Ace hardware and found my favorite paint guy. I wanted to paint the cabinets white, and I picked out a color called 'bone white.' Favorite paint guy pointed out to me that they carry that color pre-mixed, but they no longer had room for it on the shelf, so it was about 75% off. So, I got a gallon of this paint for $5, instead of spending around $20 to have it mixed. Awesome!
Here are my cabinets before:

And after a day or so of painting, here is the final product:

I will probably be making touch ups until I move out of this apartment-- every once in a while the lighting in the room will show a spot that needs some attention.  But, I'm very happy with how much brighter and cleaner the kitchen looks. Can you believe that's the same counter top as the first picture? I think its amazing how much nicer it looks. Next question-- do I paint the walls? It might need some color. And why stop now?

Sunday, April 18, 2010

I'm a Cobbler

If you live in an urban area where you do a lot of walking, chances are you are aware of the damage concrete can  cause to your shoes. I don't think there is a good way around this, besides finding a good cobbler and visiting him regularly.
Moving from Chicago to Ann Arbor has been amazing for my shoe collection, but I still have a few pairs of shoes that are in need of repair (yes, almost 2 years later). I used to spend a not insignificant amount of money have my shoes repaired at the cobbler up the street. The Cobbler, Mr. T, was amazing- relatively inexpensive, quick, and also entertaining. Mr. T was about 80 years old and liked to talk.
Sadly, Mr T would not come with me to Ann Arbor, and the cobblers here are quite a bit more expensive. So I've been exploring other options--mainly, replacing shoes. But recently I discovered these little gems:
That's right friends. Three pairs each of heel tips in two different sizes (six pairs total) for less than $3. Even Mr. T can't beat that price.
The process is pretty easy. Start with a shoe with sad, worn down heels:

Use the pliers pictured above to twist out the tip (just like a screw!). Insert a new heel tip, and tap it in using the hammer. And you're done!

Voila! Now these shoes are back in circulation! It took about five minutes, and I still have five pairs of tips left. Maybe Mr. T needs an assistant.

It wasn't such a hard project but Ellie was sure tired after.

Sunday, April 4, 2010

Cupcakes in Ann Arbor

Yesterday after a quick trip to the T.J.Maxx right near my house, I discovered something wonderful. A new cupcake shop, named Just Baked. Apparently it opened before Valentines day, but just got around to putting up a sign this week (??), and before the sign it was nearly impossible to notice. Of course I had to try out their creations, and decided I'd compare them to my current favorite cupcake bakery in Ann Arbor-- Cupcake Station.


Cupcake Station:

At Cupcake Station, my reliable 'flavors' are chocolate cheesecake and chocolate lovers. Cupcake station describes chocolate cheese cake as "Our signature Dark Chocolate Cake with our unique White Chocolate Cream Cheese Frosting, topped with Dark Chocolate Shavings." I describe it as: amazing. Their cream cheese frosting is really amazing. 

Another good choice at Cupcake Station is the mocha latte. The mocha latte is cupcake stations "signature" Dark Chocolate Cake with a rich Espresso Milk Chocolate Frosting, topped with Coffee Beans." Another yum from me. The Chocolate lovers is a very safe bet- chocolate cake and chocolate frosting. No explanation needed.


Just Baked:
The prices and menu sizes are comparable at the two shops. Just Baked happened to be out of most of their chocolate cupcakes when I was there, so I was forced to branch out a little. I bought two: a white chocolate raspberry, and a red velvet.
The white chocolate raspberry cupcake is described on Just Baked's website as "Shortbread bottom below our moist vanilla cake sprinkled with white chocolate then drizzled with a raspberry topping, white chocolate chips and a dollop of our delicious buttercream.." The cake was really moist, almost too moist, it just kind of fell apart. The raspberry topping was good, there just wasn't much of it to be had. Also, the buttercream frosting wasn't easy to bite into, I ended up taking it off the cupcake and not eating it. All and all, while the cake was good, the topping was just OK. I wasn't a fan of the buttercream.

The red velvet cupcake isn't as moist as the first, but this means its not going to crumble before I can eat it!. This was a good pick, because it has Just Baked's cream cheese frosting on it, so I can directly compare the two stores (there's the statistician coming out). The frosting on this cupcake is much lighter than Cupcake Station's frosting. While I can definitely taste the "cream cheese" flavoring, I think Cupcake Station wins in this battle.

Overall, I like Cupcake Station better at this point, but each bakery has distinct advantages. Cupcake Station is located in downtown Ann Arbor, so its unlikely to be a place you stumble upon while grocery shopping. But, it does have excellent cream cheese frosting. It's also right near the bus station, very convenient for those days when you miss the bus and have 30 minutes to kill before the next one comes. Also,Cupcake Station has three sizes- mini, normal, and large, to suit whatever appetite you have. The mini ones are excellent for just a taste, or trying a new flavor. Large ones are good for sharing. Also, many or most of the cupcakes here are baked on site, although once a flavor is gone, its gone for the day. Sometimes they close early because they are out of cupcakes!

What Just Baked has going for it is location. There is a lot of parking in that location, and it is near many other shops that people go to regularly-- grocery stores, office supply stores, the library, etc. Many people, like me, are going to pop in without planning. I don't love Just Baked's recipes as much, but there is potential. Finally, no cupcakes are baked on site. They are baked daily in another location and trucked in. Again, flavors will run out, like what I found yesterday.

(No, no, no one paid me to write this review. Although I'm open to the idea!)

Saturday, April 3, 2010

Past Project

About the same time I was working on recovering the chair in my living room, I came across a tutorial for making a tote bag, similar to the shopping bags seen in stores. I had some left over from my chair project, so I decided to make a bag out of the same fabric. Who doesn't need a bag to match her furniture! You can see the tutorial here: Sew, Mama, Sew
The bag was really easy to make, as suggested in the tutorial! I was surprised. I made the whole thing in about an hour, and its still working very well. So far it has carried personal items for a day trip, groceries, library books, food to school, etc etc...its a great size.

I want to make more of them, but try to change them up a little- for example, this bag has one pocket on the front. I think a pocket on the inside would be great. Also, why not two smaller pockets across the front? I'd also like to try making different sizes. Guess what everyone is getting for christmas this year!!

Wednesday, March 31, 2010

Kitchen Shelves

At some point in the last few months I put up some shelves in my kitchen. I wanted to display some of my nicer dishes and vases, and also at the same time put something on the huge empty wall in the kitchen. The other walls have plates and baking dishes on them, so I was kind of out of options for the big wall.
I was prepared this time--since I was planning to get some customizable shelves from my favorite hardware store (Ace Barnes Hardware!!) I wanted to be sure to get the right size for the space. I measured the wall and approximately how high up I wanted the shelves. I decided at that point I wanted probably 2 shelves. Since my walls are white and I don't have a real color scheme in the kitchen, I decided to go with white shelving.
I got the metal rods, brackets and shelves very similar to whats pictured above. It was very easy to put up on the wall--it came with all the necessary hardware and only required a screwdriver.

I put my colorful collection of  vases and what not on the shelves at first:


Inspired by others dining room hutches and shelves I've seen in blogs, I decided to streamline and put only one color on the shelves. The collection started with the cow shaped creamer you can see in this picture. I added a vase I found at the salvation army, and one day I found a couple other vases at Michael's.


I am overall very happy with this look. Eventually I may spray paint some of the pieces to match the others more closely. The pitcher in the middle in particular is much more of a cream than a white. Another future change is to replace the college-style black metal cubes with a real buffet or cabinet. I've had my eye out for a long dresser at the Salvation Army that could be used in the kitchen, but so far I haven't had any luck.

Sunday, March 28, 2010

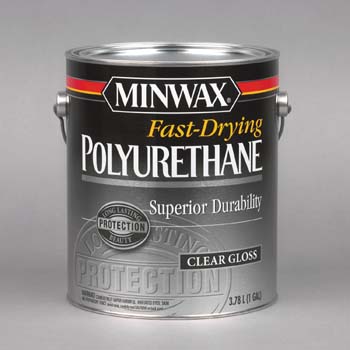
My New Best Friend


 Is clear polyurethane. From reading other DIY blogs, I know that a coat of polyurethane can make your painted furniture more shiny and more easily cleaned, but since I have always used high gloss paint I hadn't tried it. Well, after being frustrated with the side table tin my living room looking dirty, I decided to see what it did. I am VERY pleased with the results. After doing the side table, I also did my desk. I notice that when I am writing with a pencil, often the color gets transferred to the desk, and I have to wipe it off fairly frequently.
Before before:
And then:
And now:
Ok, Maybe its hard  to tell from these pictures. But it looks and feels different in person.

And the Desk:

I'm not sure what other people do, but the friendly guy at Ace told me he likes foam brushes for applying polyurethane. I took his advice, and wasn't disappointed. Not only did it apply easily and thin, but the brush itself was less than a dollar, compared to about $7-8 for a brush. If only I had more things to polyurethane...

Lamp

I got a new shade for the lamp. I'm unsure about how the colors look together, but For now, I like it. I got the shade at Target for $14.99, and this style shade doesn't require a finale. I will just save the blue shade until I have a need for it or send it to the Salvation army in a rage of cleaning things out.

Saturday, March 20, 2010

Awesome Find

One of my favorite blogs has an advertisement on the side for a website with awesome lamps. This lamp is always teasing me:

Unfortunately, it comes with a steep price tag: $299. I don't see that being an option anytime soon.

Imagine my excitment today when I find this little gem in my local TJ Maxx:
Price: $29!
Sure, its got a blue shade which doesn't fit in my decor at all, and its missing a finale..and its a different shape. But its the same lamp!! With a new shade and a finale (which will still keep this lamp at a really reasonable price) this lamp will fit right in. In the mean time I will pretend I just saved $270.

Sunday, February 28, 2010

Things I've been meaning to post for a while

A while back I came across a store called "Calico Corners." I had never heard of it, but its apparently a chain of home decor fabrics (ie NOT apparel). I was quite excited and inspired by some of what I found in the store. Below are two pictures I took with my cell phone while there:
 There was a lot of other less cool stuff there too, but overall I was impressed. I had a project in mind at the time and I thought these fabrics were good candidates (albeit more expensive than I was into)

Well, since I have been on spring break for about 48 hours, I decided it was time to do a project. The first thing I did was rearrange my living room- remove the black side table near the window, move the couch down, and put the armoire/tv back in the corner. Also I switched around a lot of my lamps. Specifically, I switched the floor and table lamp from my office into the living room, and moved the eiffel tower lamp down to the side table.
I had some ugly pillows on my couch that I bought with the intention of recovering. So I decided that could be my next project. I went to Joanns with the intent of getting some fabric that could go over those pillows,but while I was there I was struck with a better idea.

Remember this chair? Well I found a fabric that I could see myself covering that chair with. I can't find the fabric on Joanns, so you'll just have to see the actually pictures.
First you can see the pillows I made for the couch. I think the living room is really starting to come together.
This is what I did for the seat. Be patient- this isnt 100% done yet. The pillows really are the same size even if they look different in this picture. The front of the cushion needs some work- it's rounded in the front and was a challenge for me.

The best part is yet to be reveiled: one of the things I didn't like about the chair was the back. It was a little less formal than I would have liked. So I found a way to make it look more like a chair and less like patio furniture. I considered buying some foam and really making a back, but that would eliminate the need for the pillows. This worked well and it was much easier than my other ideas.


 This is the back- looking good, right? A lot more like an actual chair.


And a side view. I basically just made a case for the back and slipped it over. Probably the easiest part of the whole project.