Friday, April 27, 2012

Gardening: The Plan and some Initial Work

I have two/three separate garden spaces. One to the left of the garage in this picture, before you get to my front door.

It looked like this when I moved in, and up until today. There are a lot of different flowers in this spot, including a rose bush, azaleas, and possibly hollyhocks. How do I know this? There is a master gardener in my neighborhood who offered to help me prune the bush you can see in the above picture, and I also picked her brain about the rest of my gardens.

The next garden you come upon is to the left of the front door. It looks like this:

Here you can see the overgrown violets and the shrub, along with the lovely lava rock that is being used as mulch. I'm planning to remove those bad boys and replace them with regular mulch. I think I'd also like to plant some pretty flowers in the open space. We shall see, as I am not an experienced gardener!

The last garden is along the whole south side of my condo. It is by far the largest.
It has three huge shrubs, that here look like one right in the middle of the picture, and then some smaller shrubs to the left. To the right of the monstrosity is a rose bush and some other random flowers.
There really is a lot of work to do here. First, those three shrubs are blocking the living room windows. Second, the beds in general are a mess of weeds and regular grass from lack of upkeep over the past years. The woman that lived here before me for 35 years was 90something years old, and I'm certain she wasn't outside weeding gardens. 

This is what the same corner looked like after about 30 minutes of pulling vines out of the ground. Now the window is unobstructed and the azalea and rose bushes are visible!


Azalea bush. So pretty.

Can't remember the name of this guy.

Can't remember the name of this either. Should have been taking notes!


Ahh, one more look at the clean bed.

Before


After:

I am generally overwhelmed by the gardens I have to take care of here, so I am going to start slowly. My goal for this spring is to get the two corner gardens in good shape by removing the lava rocks and putting down mulch, and then next spring I can focus on the longer back garden. I want to remove those large shrubs from the back but need to figure out how exactly that can happen. Dig them up? Cut them down?


Sunday, April 22, 2012

May Punch List

It's been a couple months since I've updated my punch list, but here goes:
Here is my room by room punch list. It's still growing.


My focus for May is going to be 
  • Removing the lava rocks from the garden and replacing with mulch
  • convincing Mike its time to start the baseboards
  • Possibly getting a new dishwasher
  • Continuing to replace outlets and switches throughout the whole house


Throughout whole house:
  • Replace lightswitches and outlets with new, white ones- Done about 8 of them! Getting there.
  • Replace lightswitch covers and outlet covers
  • Have GCI outlets installed in bathroom, kitchen;- scheduled for Dec. 22
  • Purchase and install programmable thermostat
  • Purchase and install new smoke detectors and carbon monoxide detector
  • New Windows! Details soon.
  • Paint trim on new windows- In progress
  • Replace old gross air vents with new ones
Kitchen
  • Paint Cabinets (in progress)
  • replace counter tops?
  • replace floor- purchased! Installed!
  • Decide on color and paint walls
  • paint trim
  • Install under-cabinet lights
  • Replace Fridge, Dishwasher, Range <- New dishwasher is in the works. Current one died last week! :(
Living Room
  • Paint Walls "Wild Aster"
  • Pick out, buy and Install baseboards
  • Paint Trim
  • Replace carpet with laminate!?? <- Purchased! Waiting to get installed!
  • Hang Curtains
  • Get new Couch
  • Hang Art, mirrors- Still some work to do here
  • Hang blinds?

Bedroom
  • Decide on color and paint walls
  • Paint trim
  • Paint Closet
  • Redo Closet system
  • Hnng Curtains
  • Hang art, mirrors
  • Replace carpet
Bathroom
  • Remove shower doors
  • Hang shower curtain
  • paint vanity
  • paint trim
  • Replace or Frame mirror
  • Remove Wallpaper
  • Decide on color and Paint walls
  • Clean grout or regrout?
  • Replace Faucet AND sink!
Second Bedroom
  • Decide on color and paint walls
  • Paint trim
  • Redo closet?
  • Replace carpet
Basement
  • Paint paneling white <-!! Details coming!
  • fix water damaged walls (probably a contractor will do this)
  • replace carpet
  • Finish basement bathroom (what a nutty set up!)
  • organize and set up sewing area
  • replace washer and dryer? Ordered! Delivery Dec. 6th!
Gardens (writing a whole series of posts on the gardens right now)
  • Prune shrub <- done with help of Master gardener neighbor. Deets soon.
  • Remove ugly vine
  • Remove lava rocks and 
    • replace with mulch
  • Pick out and plant flowers for two side gardens

Light!

Continuing my progress in the bathroom is the replacement of the ugly 60's style light above the mirror. Unfortunately I don't have a great before picture...how did that happen?? Here are the two best pictures I have of it. Hard to see because the light is on!


I found a similar light online- mine looked like this except no starburst pattern, and frankly this looks like a nicer version of what I had.I'm certain this light was original, so from the mid-70's.

I replaced it (all by myself!) with this light I found at the local re-use center. I paid $12.50 for it total, including the three glass shades. I recently went to Lowes and saw the same fixture for sale there for about $55. I felt pretty smug about that.


It's a huge improvement. In addition to it looking more of-this-century, the added light from the 3rd light bulb makes a huge difference. The bathroom has so much more light now!
Of course I wasn't happy to stop there. While the shades on this fixture are ok, I don't love them. I found these seeded glass "bells" at Home Depot, for about $7 each and put them up in place of the shades that came with the fixture. Even now, I've only spent $33 on this light fixture total, still more than $20 less than what the cost of this fixture new is, so I felt ok spending the extra money to get the look I wanted.

It looks kind of blue here, but I promise, its clear.


It was clear immediately that I need clear light bulbs in the fixture instead of white ones. I bought some recently but they are way too bright, so I need to try again. I had a hard time finding the ones I got (which are Halogen) so hopefully I can find similar ones with a smaller wattage. 

Regardless I'm psyched about how my bathroom is looking. The counter top is getting closer and closer to the top of the list!


Saturday, March 17, 2012

New Bathroom Cabinet

Where we left off last, my bathroom looked like this:


Big empty wall, and a tiny little medicine cabinet. I thought about doing open shelves in that area, but ultimately I wanted to be able to hide some of my things out of sight so I didn't have to throw everything under the sink when someone came by.
Enter this cabinet!
I got it for $59 at Home Depot. I tried to find a similar cabinet at various resale stores instead of buying a new one, but I had no luck and I was running out of patience. Home Depot actually has a reasonable selection of these types of cabinets- more shallow than a regular kitchen cabinet and yet the same height. The guy at home depot told me these are called "Over John" cabinets. Lovely.

The cabinet stayed in my car until the weekend when Mike and I could put it up. We watched several youtube videos on ways to install cabinets, and decided on a basic approach of drilling pilot holes in the wall and corresponding holes in the cabinet, putting anchors in the wall and then screwing through the cabinet into the wall. I just have to show you how we managed to keep the cabinet at the height we wanted without breaking our arms, AKA I didn't buy all those textbooks for nothing!

This is the junk I'm talking about. 

Now you know what I read.

Mike is really excellent (and exact) at tasks like this, so I'm certain I could hang off this cabinet and it wouldn't fall down (not that I'm going to try) but also it is perfectly level, and even with the top of the mirror. Well done, Mike!


I want to pretty up that area now with some unnecessary accessories like a plant and maybe some pretty candles or something, but for now, this is what my bathroom looks like. I'm quite happy with the outcome!

The two things left that bug me are doing something with that dang ugly counter top (perhaps painting it), and making a curtain of some sort to cover the strange open space under half of the counter. Actually, I would really love to find the same fabric that my shower curtain is made of. The shower curtain is from Target, about 3 summers ago. Anyone have one kicking around that I could buy? I've tried to find one on Ebay, etc but have had no luck.

src="http://i578.photobucket.com/albums/ss229/krystalwinn/hfd/cowgirl-up-003-button-4.jpg"
/>


Tuesday, March 13, 2012

Simplicity 2444

This past weekend was a good one. I got several projects around my condo done, errands run and even finished a sewing project!
While browsing Joann's on Saturday, I came across this fabric from April Johnston's line. 
I liked it, but I wasn't sure what I would make with it, so I didn't pick it up (trying to resist the urge to hoard fabric!). Then later in the store I saw a repackage of Simplicity 2444 as Simplicity 0345 or something like that, which was just view A of this pattern below, and it was made in the above fabric. I decided this is what I would make with the fabric. Luckily Simplicity patterns were on sale at Joann's still, so I was able to get a copy of the full pattern for $1.99. I bought 2444 so I'd have the options of the neckline variations and sleeve variations in the future.


The dress sewed up really easily, I finished it in just a couple hours. The only change I made was to use pre-made bias tape instead of the facing the include in the pattern. This was just sheer laziness. I also used iron-on hem tape for the first time--not like stitch witchery, but a nice ribbon with adhesive on it that you use to finish a hem. Perhaps you all know what this is, I had never seen it before. I got it in a large lot of sewing notions at the Salvation Army several months ago. 

I wore the dress to work with a bright orange cardigan, a pink beaded necklace and nude suede wedges, all from Target! (I love that place). I felt very springy, even though it rained most of the day.


Here is the dress without the cardigan.You cant see the bias tape, and that's the idea! I really love how it fits, and I lucked out again and didn't make any alterations. I think I will put a dart or two around the neckline to get it to lay flat but otherwise it is good to go. Apparently I need a new hairdo.


Have you sewn this pattern? Did you like it?

Sunday, March 11, 2012

Early Summer Butterick Patterns!

As if I don't have enough patterns already, I've looked over the new "early summer" offerings from Butterick and made some picks.

First, B5749:


I like this one because it looks dressy, but not so dressy that I couldn't wear it to work. I like the draping of the neck and waist. 

B5750:


Another one that I see as versatile, able to dress up or down. Plus it looks very breezy and summery.


I really like view B of this pattern. I am currently digging the look of the skirt. I'm unsure if I would leave the ruffle on there or not, but I guess it gives it some nice visual appeal. 

Unfortunately this round of patterns lacks any in the "WTF" category, I have no snarky comments to make about any of them!

Friday, February 24, 2012

New Spring Vogue Patterns

Vogue released their new spring patterns ohh maybe 2 weeks ago. At about the same time, Vogue patterns were on sale for $3.99 at Joanns, so I picked up a couple.

The first one is V8787, an Easy Options pattern with an asymetrical neckline. I've actually already whipped this one up and wore it to work, it is a great little dress. I need to get pictures of it! I made view A below.


The other pattern I bought is V1287, a DKNY pattern. It's hard to see the details in the picture because of the crazy pattern they used but the line drawing shows it better. Also I liked that this pattern includes a slip. I am definitely going to make myself some slips! It is getting harder and harder for me to find the kind that I like.


Here are some patterns I didn't buy because I don't know when I would wear them, but I definitely like. 
The first is V1280, a Donna Karan pattern. I like the interesting straps and asymmetrical back. But its a little too fancy for wearing to work!


Lastly is V1286, a Tracy Reese pattern. This is definitely not appropriate for work but could make a cute summer dress for the weekends...or a cocktail dress if made from the right fabric. I may end up buying this pattern next time Vogue is on sale at Joann's. I just really love the back and the banding on the front.


In the WTF category is V1284, a Guy Laroche pattern. It's not flattering at all on the model and I can't imagine it would look good on anyone with curves! The model looks pissed and I can imagine why. Uggggllyy.


Thursday, February 23, 2012

New Sewing Room: Keeping it Real

Since my last post, I have moved all my sewing supplies up to the second bedroom. Here are some photos of how it looks now (pardon the mess!) I'm still trying to figure out the best placement of the furniture and all the gadgets I need. I also plan to put some things on the wall-- currently all my notions are in the closet but they would be more easily accessible on a shelf.

And I need to repaint my desk...but I love the light that comes thru these windows.

My ironing board.

This book case is going to have to move elsewhere. I don't use my statistics and calculus texts much while sewing, although they'd probably make nice pattern weights.

Nice view out the window!


I'm not the only one that's enjoying the light in the new sewing space:


Monday, February 13, 2012

Cha Cha Cha Changes

One of the things I was most excited about when I moved into my condo was the basement, and my plans to make it my sewing space.

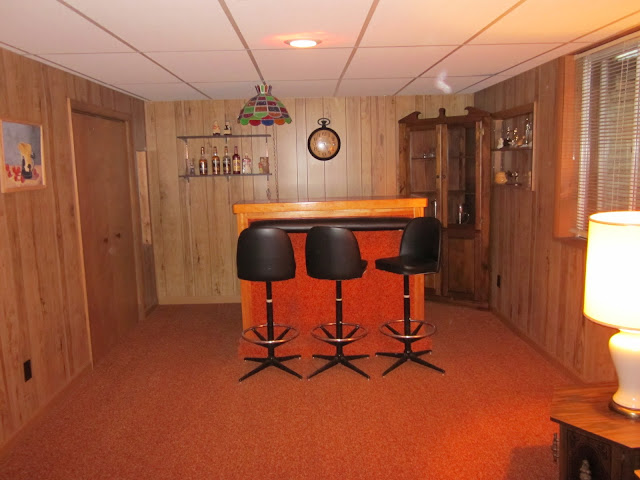
I've done that now, and I have to be honest. I don't like it. It's dark. It's kind of cold, and its dark. There is one small closet that I can store things in, and the rest of the stuff is out on a big wire shelf. It's ugly. I haven't posted pictures before because it never looks good in pictures, regardless of the amount of cleaning I do. But here are some pictures now...
While painting the walls white- ceiling tiles removed because of water damage from the kitchen flooding


The area that now houses my elliptical


In the meantime, I have a nearly empty upstairs second bedroom with amazing light that I don't use. So while I was planning to make that into a guest room, but I spent last weekend carrying up a bunch of sewing things to make that room my sewing area. This is my space and I should use it however makes me most happy! I can always get an air mattress for guests to use in the sewing room instead of the bed...or hey, why not make the basement a "guest room"?